Культура и биография (pillars of eternity)
Содержание:
Проклятые сокровища
В древние времена люди устраивали частые экспедиции вглубь в поисках скрытых чудес. Затем, как и сейчас, искатели сокровищ из других миров периодически прибывали, очевидной с той же целью, и вполне возможно, что некоторые новые племена произошли от таких обездоленных, которые оказались в затруднительном положении. Эти подземные экспедиции редко возвращаются успешно или вообще возвращаются. Стражи некронов всегда защищали Чёрные Катакомбы, даже когда сами некроны спали. В наши дни племена считают, что войти в Чёрные Катакомбы — значит стать проклятым, и только смерть ожидает тех, кто достаточно глуп, чтобы сделать это. Племена унаследовали множество историй об этих ужасных стражах: стаях металлических насекомых, призраках с лезвиями, появляющихся из самых стен, гигантских металлических пауках и массивных змей, которые одинаково легко пробуриваются сквозь лёд и скалы. Истории также рассказывают о таких чудесах, как невероятно большие залы, заполненные сотнями тысяч стальных скелетов, обширные пещеры, где зелёные дуги молний пробегают между огромными рядами тайных устройств и кристаллов, и мерцающие проёмы, из которых никогда не возвращаются.
Многие из этих историй рассказывают об ужасных судьбах, которые ждут тех, кто достаточно глуп, чтобы спуститься через пещеры и скалы в глубины подземного мира Вечности. Одна такая легенда говорит о алчном колдуне, который вопреки советам своих собратьев спустился в стальные пещеры с небольшой группой умелых воинов. Благодаря могучей магии колдуна и мастерству воинов, отряд пробился сквозь смертельных призраков, которые не давали им войти в склепы. В конце концов грабители гробниц обнаружили большую залу, заполненную урнами, сундуками и странными саркофагами. Каменные полки, покрывающие комнату, были завалены прекрасными сокровищами — фантастическими гололитами, золотыми украшениями, ослепительными зелёными драгоценными камнями и таинственными кубиками серебра
Осторожно, чтобы не потревожить саркофагов и не разбудить мертвецов, эти люди разграбили склеп, полностью набив сокровищами свои мешки из шкур.
Чёрные Катакомбы
У племён есть много мифов и легенд, окружающих Чёрные Катакомбы, которые лежат глубоко подо льдом. Разбросанные повсюду трещины и пещеры ведут к обширным туннелям из гладкого камня и металла, которые спускаются вглубь земной коры. Как далеко идут эти катакомбы, неизвестно, ибо немногие из тех, кто по ним спускался, когда-либо вернулись. Только отчаянные, безумные или по-настоящему честолюбивые люди осмеливаются шагнуть в глубины. Хотя мифы говорят об огромной опасности и жестоких стражах, они также рассказывают о великих сокровищах и могущественных артефактах. Шаманы предупреждают, что магия, ждущая в глубинах, послана не богами и её следует избегать. Тоннели-лабиринты описываются как действительно обширные, и, как говорят, входы в них можно обнаружить по всему миру. Сила спящих под землей не ограничивается глубинами, а простирается за пределы их склепов и гробниц. Племена избегают этих областей, которые шаманы называют «мёртвыми равнинами», областями, где боги далеки, а магия слаба и неэффективна. Племена никогда не поселятся в этих местах, которые, как полагают, являются проклятыми землями, и кочевники путешествуют многие дни, чтобы избежать их.
В то время как племена могут красть друг у друга и воевать, их объединяет восхваление Тёмных Богов и страх и ненависть к катакомбам и обитающей в них нежити. Однако это относится не ко всем населяющим мир людям. Редко упоминаемые племенами, развращённые Н’крир — отвратительные пещерные люди, которые живут в самых верховьях древних разрушающихся туннелей, почти забытых их строителями. Не ясно, как до этого дошло. Некоторые говорят, что Н’крир когда-то были таким же племенем, как и другие, но были вынуждены предать своих богов или же столкнуться с истреблением от рук исконных жителей планеты. Другие полагают, что когда это племя впервые стало свидетелем удивительных металлических чудес, они позабыли своих богов и изгнали своих псайкеров. Н’крир поклоняются некронам как богам, принося жертвы и молитвы в обмен на покровительство. Говорят, что эти предатели делают наряды из собранного металла, чтобы их духовные лидеры могли принять облик своих стальных богов во время церемоний. Неясно, считают ли некроны этих людей слугами, вассалами или паразитами, или знают ли они вообще об их присутствии.
The White March — Part II[]
The second expansion for Pillars of Eternity. The DLC continues the story started in The White March — Part I, expanding the game world with new locations and quests.
Side quests
| Quest | Given by | Start location | Notes |
|---|---|---|---|
| Iron and Flame | Masca | Stalwart Village – Temple of Abydon | |
| Whispers in the Dark | Foreman Ismey | Stalwart Village – Stalwart Mines | |
| Ready the Cannons | Deryan | Stalwart Village | |
| The Phylactery’s Promise | Ogne | Requires completion of both, the Siege of Crägholdt and The Iron Flail. |
Tasks
| Task | Given by | Start location | Notes |
|---|---|---|---|
| Wild Mylla | Royse | Stalwart Village | |
| Risk Tolerance | Tarfos | ||
| Bleak Oath | Kern | Stalwart Village – The Gréf’s Rest | |
| Bogged Down | Herla | Mowrghek Îen |
Bounties
| Task | Given by | Start location | Batch |
|---|---|---|---|
| Bounty: The Terror of Whitestone Hollow | Asca | Stalwart Village | 1 |
| Bounty: Magran’s Faithful | 1 | ||
| Bounty: Redwater Lagufaeth | 2 | ||
| Bounty: Brynlod | 2 |
Ranged weapons[]
Bows and crossbows
Bows and crossbows have the largest attack range among all the ranged weapons in the game. Bows are the fastest to use. Crossbows are slower to reload/fire than hunting bows or war bows but they do more damage. The more powerful Arbalests can’t be cocked by hand and need to be planted and cranked, and thus are slower to reload than crossbows, but still faster than Firearms.
| Bows | Base Damage | Damage Type | Range | Speed | Interrupt | Weapon type bonus | Weapon Focus / Specialization |
|---|---|---|---|---|---|---|---|
| 10-15 * | Pierce * | 12m * | Fast | 0.5 sec (Average) | Faster than War Bow | Peasant | |
| 13-20 | Pierce | 12m | Average | 0.5 sec (Average) | Increased damage over Hunting Bow | Adventurer | |
| 18-26 | Pierce | 12m | Slow | 0.75 sec (Strong) | Middle ground between the arbalest’s damage and bow’s speed. | Knight | |
| 22-32 | Pierce | 12m | Very Slow | 0.75 sec (Strong) |
|
Soldier |
* Except for Massuk Hunting Bow, a Sagani companion’s bow, which has a slightly lower Damage (10-14) and slightly lower Range (11m), but deals Pierce / Crush damage (whichever one is the best against target’s Damage Reduction).
Except for Stormcaller, which deals Pierce / Shock damage (whichever one is the best against target’s Damage Reduction).
Firearms
Firearms are very slow to reload, taking longer to reload than any other weapons and aren’t very accurate, but they make up for it by dealing high damage, their low base Interrupt value and unique advantage in dealing with Wizards standard magical defense.
Arquebuses do the most damage per shot of the firearms and have the lowest accuracy penalty but are the slowest to reload. Pistols do less damage than arquebuses and have a higher accuracy penalty but reload faster. Blunderbusses reload as fast as pistols and are quite inaccurate, but they fire 6 projectiles that each do a small amount of damage. If the target does not have much armor and has low Deflection, or if it’s from a Sneak Attack, blunderbusses are the most devastating.
| Firearms | Base Damage | Damage Type | Range | Speed | Interrupt | Weapon type bonus | Weapon Focus / Specialization |
|---|---|---|---|---|---|---|---|
| 6-9 (six projectiles) | Pierce | 8m | Very Slow | 0.05 sec (Weakest) |
|
Ruffian | |
| 22-30 | Pierce | 8m | Very Slow | 0.35 sec (Weak) |
|
Ruffian | |
| 24-36 | Pierce | 10m | Extremely Slow | 0.35 sec (Weak) |
|
Soldier |
Magical implements
Magical Implements are ranged magical missile weapons, that are quite fast and accurate, but not very powerful and have low interrupt value. Wizards gain a bonus via their Blast ability when using Magical Implements.
| Implements | Base Damage | Damage Type | Range | Speed | Interrupt | Weapon type bonus | Weapon Focus / Specialization |
|---|---|---|---|---|---|---|---|
| 9-14 | Pierce / Crush(Best) | 10m | Fast | 0.5 sec (Average) | Adventurer | ||
| 9-14 | Crush / Slash(Best) | 10m | Fast | 0.5 sec (Average) | Noble | ||
| 11-16 | Pierce / Slash(Best) | 10m | Average | 0.5 sec (Average) | Noble |
Synopsis[]
The Watcher’s new steward has informed them that, long ago, a powerful Engwithan constructed a labyrinthine dungeon underneath Caed Nua now known as the Endless Paths of Od Nua. Od Nua was killed by the people of his time for his deeds, but the steward claims that a powerful force still dwells within the ruins. Whenever someone attempts to take possession of Caed Nua, this ‘Master Below’ stirs awake and sends forth a flood of monsters to reclaim it. If the Watcher does not deal with this sinister presence, they may eventually share the same fate as the Aedyrans who tried to claim this land long ago.
Ranks[]
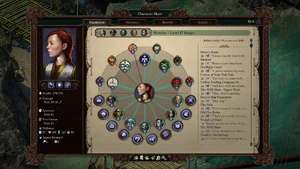
The reputation tab in the character sheet window of Deadfire. The upper semicircle represents both major (inner) and minor (outer) faction reputation. The circle around the faction icon has 3 bars on either side, the left hand side in red represents negative reputation and the right in blue represents positive reputation. The small circle underneath the faction icon shows the current rank type and value, blue for good, red for bad, and purple for mixed.
There are three types of reputations you can have with a faction: positive, negative (good, bad in Deadfire), and mixed. Losing reputation and gaining reputation don’t cancel each other out, but instead are tracked separately. If your positive and negative reputation are around the same, your overall reputation will be mixed.
In addition to the type of reputation, there is also a rank, showing how well your reputation is received. The ranks are as follows:
Positive Reputation
- Ally (Faintly Good)
- Hero (Moderately Good)
- Champion (Overwhelmingly Good)
Mostly Positive Reputation (some negative)
- Friend (Somewhat Good)
- Defender (Extremely Good)
Negative Reputation
- Troublemaker (Faintly Bad)
- Villain (Moderately Bad)
- Terror (Overwhelmingly Bad)
Mostly Negative Reputation (some positive)
- Rascal (Somewhat Bad)
- Scoundrel (Extremely Bad)
Mixed Reputation
- Neutral
- Eccentric (Faintly Mixed)
- Oddity (Somewhat Mixed)
- Merciful Brute (Moderately Mixed)
- Dark Hero (Extremely Mixed)
- Maniac (unused)
Rank overview
| Positive | Negative | Rank type | Rank | Shown as | ||
|---|---|---|---|---|---|---|
| Index | Range* | Index | Range* | In poe1 | In poe2 | |
| 0-15% | 0-15% | Default | 1 | — | — | |
| 1 | 15-50% | Bad | 1 | Troublemaker | -1 | |
| 2 | 50-100% | Bad | 3 | Villain | -3 | |
| 3 | >= 100% | Bad | 5 | Terror | -5 | |
| 1 | 15-50% | 0-15% | Good | 1 | Ally | 1 |
| 1 | 15-50% | Mixed | 1 | Eccentric | 1 | |
| 2 | 50-100% | Bad | 2 | Rascal | -2 | |
| 3 | >= 100% | Bad | 4 | Scoundrel | -4 | |
| 2 | 50-100% | 0-15% | Good | 3 | Hero | 3 |
| 1 | 15-50% | Good | 2 | Friend | 2 | |
| 2 | 50-100% | Mixed | 2 | Oddity | 2 | |
| 3 | >= 100% | Mixed | 3 | Merciful Brute | 3 | |
| 3 | >= 100% | 0-15% | Good | 5 | Champion | 5 |
| 1 | 15-50% | Good | 4 | Defender | 4 | |
| 2 | 50-100% | Mixed | 3/4 | Merciful Brute | 4 | |
| 3 | >= 100% | Mixed | 4/5 | Dark Hero | 5 | |
| * Note that ranges are lower limit inclusive and upper limit exclusive. |
Crowdfunding campaign[]
The campaign launched on January 26, 2017 on the crowdfunding platform Fig, with a funding goal of US$1.1 million with US$2.25 million open for equity. The funding goal was achieved in under 23 hours. Over the remaining period, Obsidian raised a total of $4,545,395, made up of $2,157,598 of backer pledges, $2,250,000 from «Fig Funds» / private investors, and $137,797 of post-campaign preorder pledges. The campaign closed on February 25, 2017.
During the campaign, various goals were set which promised the addition content to the game upon reaching certain levels of funding.
Funding timeline
| Goal | Reached on | Additional game features |
|---|---|---|
| $1,100,000 | January 27, 2017 | Localization for English, French, German; Multi-classing |
| $1,400,000 | January 28, 2017 | Sub-classes |
| $1,600,000 | January 30, 2017 | Localization for Russian; Level cap increase from 16 to 18 |
| $1,800,000 | January 31, 2017 | Localization for Polish; 7th companion: Xoti, priest/monk |
| $2,000,000 | February 2, 2017 | Localization for Spanish; AI customization for the player and their companions |
| $2,200,000 | February 7, 2017 | Localization for Italian; UI customization; watercolored NPC portraits |
| $2,400,000 | February 9, 2017 | Localization for Korean; double the amount of voice-over |
| $2,600,000 | February 13, 2017 | Berath’s Blessing: various bonuses when starting a new game |
| $2,800,000 | February 17, 2017 | Full orchestra soundtrack; Level cap increase to 20; more Sub-classes |
| $3,000,000 | February 19, 2017 | Expanded relationship features between companions |
| $3,250,000 | February 22, 2017 | Up to four sidekicks, voyaging with the player |
| $3,500,000 | February 23, 2017 | Localization for Portuguese; New ship upgrades |
| $3,750,000 | February 25, 2017 | Localization for simplified Chinese; New islands to explore |
| $4,000,000 | February 26, 2017 | New ship types to own and customize |
| $4,250,000 | February 27, 2017 | Intelligent talking soulbound weapon |
| $4,500,000 | March 1, 2017 | Ship crew — hire and manage a crew for your ship |
| $4,750,000 | Cancelled | Sea monsters and fishing |
| $5,000,000 | Cancelled | 8th companion — adds Ydwin as a full companion |
Content, created by the backers
Main article: Pillars of Eternity II: Deadfire backer created content
Partly limited, or made available again, backers can invest certain amounts and benefit from one of several goodies.
- Name a pet
- Create an item
- Portrait in-game
- Be an NPC
- Create a super-pet
- Create a spell
- Build a pirate party
- Create an inn
- Own an island
- Top backer (meet the team, amongst others)
Backer tiers
These were the reward tiers available via the crowdfunding campaign. .
- Obsidian Initiate ($5)
- Digital Download ($29)
- Premium Digital ($45)
- Physical Box ($59)
- Ultimate Digital Edition ($65)
- Complete Pillars Bundle ($79)
- Early Access + Credits ($99)
- Early Access + Credits + Box ($109)
- Collectors Edition ($149)
- Elite Collector’s Edition ($199)
- Signed Elite Collector’s Edition ($249)
| Features | Obsidian Initiate | Digital Download | Premium Digital | Physical Box | Ultimate Digital Edition | Complete Pillars Bundle | Early Access + Credits | Early Access + Credits + Box | Collectors Edition | Elite Collector’s Edition | Signed Elite Collector’s Edition | Higher tiers† |
|---|---|---|---|---|---|---|---|---|---|---|---|---|
| Digital content | ||||||||||||
| Pillars of Eternity II: Deadfire | ||||||||||||
| Pillars of Eternity I: Hero Edition + White March Part I and II | ||||||||||||
| Tyranny 33%-off Coupon | ||||||||||||
| Tyranny 50%-off Coupon | ||||||||||||
| Special In-Game Item #1 | ||||||||||||
| Special In-Game Item #2 | ||||||||||||
| In-Game Pet | ||||||||||||
| Digital material 1 * | ||||||||||||
| Digital material 2 ** | ||||||||||||
| Misc | ||||||||||||
| Forum Badge | ||||||||||||
| VIP Forum Badge | ||||||||||||
| In-Game Credit | ||||||||||||
| Gold Tier In-Game Credit | ||||||||||||
| Early Access Beta | ||||||||||||
| Backer created content | ||||||||||||
| Physical content | ||||||||||||
| Physical Box Copy of Pillars II | ||||||||||||
| Collectors Box | ||||||||||||
| Collectors Box (signed) | ||||||||||||
| Physical material 1 *** | ||||||||||||
| Physical material 2 **** | ||||||||||||
| Space Pig Plushie | ||||||||||||
| Cost | $5 | $29 | $45 | $59 | $65 | $79 | $99 | $109 | $149 | $199 | $249 | $500-10,000 |
| Backers | 107 | 15,506 | 10,023 | 676 | 1,484 | 1,095 | 803 | 73 | 1,236 | 976 | 628 | 126 |
Click «Expand» to show legend
- * Digital material 1 includes:
- Digital Guidebook Volume II
- Digital Soundtrack
- «Cooking with Tim, Vol. 1» Digital RPG Cookbook
- Pillars of Eternity Pen & Paper Starter Guide.
- ** Digital material 2 includes:
- High-Resolution Digital Map of the Deadfire Archipelago
- Additional Desktop Wallpapers
- 10 Pieces of Digital Concept Art
- Pillars of Eternity II Phone Backgrounds
- All-new Pillars of Eternity II Novella
- Collected Pillars of Eternity I Novellas Omnibus Version
- Pillars of Eternity Digital Deluxe Soundtrack (includes The White March OST)
- *** Physical material 1 includes:
- Cloth Map
- Mousepad
- Patch
- 8×10 Concept Art Print
- Space Pig Pin
- **** Physical material 2 includes:
- 10″/25cm Od Nua Statue
- Hardcover Guidebook Volume II
- Pillars of Eternity II: Deadfire Game Manual
† See: Pillars of Eternity II: Deadfire backer created content
Gameplay[]
Pillars of Eternity takes the central hero, memorable companions and the epic exploration of Baldur’s Gate, add in the fun, intense combat and dungeon diving of Icewind Dale, and tie it all together with the emotional writing and mature thematic exploration of Planescape: Torment.
The world map is dotted with unique locations and wilderness ripe for exploration and questing. You’ll create your own character and collect companions along the way – taking him or her not just through this story, but, with your continued support, through future adventures. You will engage in dialogues that are deep, and offer many choices to determine the fate of you and your party. And you’ll experience a story that explores mature themes and presents you with complex, difficult choices to shape how your story plays out. The keys to success in combat is positioning your party and coordinating attacks and abilities.
The game uses a tactical «real-time with pause» system and a slow combat toggle that can be used with or in lieu of the pause feature. The camera has a fixed axonometric (high angle like isometric) perspective with zoom. The environments are 2D backgrounds combined with 3D characters and visual effects.
Deity[]
When players create a priest character, they select a deity. Each choice highlights two types of behavior that are celebrated and two types of behavior that are condemned. For priests played as the main character, their Holy Radiance power will shift based on their behavior. Reinforcing their deity’s preferred behavior will gradually increase their power, while playing against type will cause a small diminishment in their power. These changes are not dramatic, but reflect a measure of dissonance between the character’s stated faith and how they choose to conduct themselves.
Moreover, each deity will give access to an exclusive and one .
| Deity | Favored dispositions | Condemned dispositions | Favored weapons | Exclusive talent | Exclusive |
|---|---|---|---|---|---|
| Berath | Stoic, Rational | Cruel, Passionate | Mace, Great sword | The Pallid Hand | Symbol of Berath |
| Eothas | Honest, Benevolent | Cruel, Shady / Deceptive | Flail, Morning star | Hope Eternal | Symbol of Eothas |
| Magran | Aggressive, Clever | Passionate, Diplomatic | Sword, Arquebus | Inspired Flame | Symbol of Magran |
| Rymrgand(unavailable for player) | Rational, Honest | Diplomatic, Benevolent | Hatchets | — | Symbol of Rymrgand |
| Skaen | Cruel, Shady / Deceptive | Aggressive, Benevolent | Stiletto, Club | Prey on the Weak | Symbol of Skaen |
| Wael | Deceptive, Clever | Rational, Honest | Quarterstaff, Rod | Incomprehensible Revelation | Symbol of Wael |
| Woedica(unavailable for player) | Rational, Cruel | Diplomatic, Benevolent | Unarmed | — | Symbol of Woedica |
Interactions[]
Pillars of Eternity
He can be found in Crägholdt, in his study at the south-west corner of the map.
| This character is involved in quests. |
Quests
- Siege of Crägholdt: When you face him, he tells you a little about himself. But he won’t let you leave peacefully, because he sees an opportunity to use your Watcher soul for research purposes. No matter what you say, you end up having to fight him. Even if the Watcher tries to leave without attacking, Concelhaut will say, «Where do you think you’re going? I’m just getting started with you.»
- If the Watcher explains that he investigated the siege because they thought Concelhaut may have required their aid, he will laugh with amusement.
- Fighting him is one of the more difficult battles in the game. Other than the Watcher themselves, though players may be tempted to bring along their wizards, e.g., Aloth, for lore and/or role-playing purposes, there is no additional special dialogue associated with this. Concelhaut does have some unique dialogue if the Watcher is a Wizard, and also if the Watcher has a high Lore skill. Care should be taken not to attack him with spells while he has Arcane Reflection up. This buff can last a ridiculously long time, making magical attacks and spell casters inefficient for much of the duration of the fight. Once his Arcane Reflection runs out and if he is engaged in melee with low health, he will use his infamous parasitic staff along with draining touch.
- Generally it is advisable to position the fight in such a way so that Concelhaut’s minions cluster together, allowing you to eliminate most of them before having to engage him directly. For example, using a ranged character to initiate a force-attack on one of his minions, then retreating to the entrance of Concelhaut’s chamber will usually result in his minions concentrating in a mob that is susceptible to AoE spells and attacks, while Concelhaut himself is forced to remain behind them, limiting his ability to target and cast his deadly spells.
Pillars of Eternity II: Deadfire
In Pillars of Eternity II: Deadfire, he is a tough opponent who uses mind-based afflictions and is surrounded by a number of fairly high-level minions. He is found on the rooftop of the observatory, past the Orrery.
| This character is involved in quests. |
Quests
Bekarna’s Folly: Concelhaut makes a triumphant return after the previous game, this time focusing on acquiring Bekarna’s research.
External links[]
- Official site
- Official forum
- Backer portal
- Crowdfunding campaign
Social media
- The World of Eternity on Twitter
- Obsidian Entertainment’s Twitter
- The World of Eternity on Facebook
- Obsidian Entertainment on Twitch
- Obsidian Entertainment on YouTube
Other
- Pillars of Eternity 2: story, setting, companions and more — everything we know – Interview with Josh Sawyer on PCGamesN
- Pillars of Eternity — The RPG Files — Pillars of Eternity II: Welcome to the Deadfire — MMORPG.com – Interview with Josh Sawyer on MMORPG
- Obsidian announces Pillars of Eternity 2: Deadfire | PC Gamer – Article on PC Gamer
Background[]
Xoti is a worshipper of Gaun, an aspect of Eothas focusing on the cycle of rebirth. Her early life was steeped in the devastation of the vorlas blight and the Saint’s War, together with the inevitable fallout from the defeat of St. Waidwen. She chose to follow an aspect of Eothas that wasn’t blown to bits by the Godhammer.
As a priestess of Gaun, she’s fairly unorthodox (some even say profane). She believes that the death of Eothas at Halgot Citadel has not wiped out his aspects and Gaun, the rebirth aspect, is the part that fits her best. She’s mostly self-taught, having started with the simple teachings of her aunt, and then books. Lots and lots of books. She read all the doctrines of Gaun, including the twelve books of Nyrwith, epistles from the minor prophets, and other apocrypha. In her view, though a lot of them aren’t a part of today’s canonization, that doesn’t mean they’re wrong. In the end, she chose to become a Reaper: A shepherd of lost souls, gathering them and storing them safely until the god of rebirth returns to Hel to allow them to be reborn to Eora.
Xoti was led to the Deadfire by dreams, filled with the dead left by Eothas in his wake.
Points of interest[]
You can come across this space in two ways, depending on whose side you choose in Defiance Bay.
If you side with The Dozens, you have access to the quest The Bronze Beneath the Lake, and you should go to that page for a complete walkthrough (note that the lower floor will remain flooded until the end of Act II, so you will not be able to access it during this quest.)
- Go to Woodend Plains and speak to the Giantslayers adventuring group near the southern end of the area, on a small rise with a wagon on it.
- From them, either via dialog or combat, you can obtain a small Adra stone that acts as the ‘key’ to enter the area.
- The ‘key’ will only open the stairway at dusk; interact with the small circle southwest of the entrance stairs and choose ‘wait a little while until it is dusk. The key will then drain the water and open the stairs.
If you side with either the Knights of the Crucible or House Doemenel (and do not attempt The Bronze Beneath the Lake), then the entrance to Lle a Rhemen will open (without a key) after the end of Act II upon completion of The Hermit of Hadret House.
Upper level
| “ | There is no truer blade than essence forged in bronze. Turn twice to the left and prepare your soul for its reckoning. | ” |
The upper level can be accessed from the ruins in the northwestern section of Stormwall Gorge.
The exit to the lower floor is immediately to the west; you will need a grappling hook (only after the floodwaters have receded). Instead, speak with the stone head over the archway. It tells you to turn left twice; ignore its advice for now and turn right (south) instead. You’ll find a room with a pillar and a bunch of dead adventurers. You’ll also find their spirits haunt this place in the form of Spectres.
Return to the north and turn left, killing a few spiders, and turn left again. There’s an adra pillar with another talking stone face, who asks you some questions. The answers you give will affect the enhancements placed on Cladhalíath, should you choose to acquire that weapon (see its item page for details). One of the mystic symbols around the room will light up in response. Proceed to the north again and around the corner into a second room with a stone face who asks different questions.
Now as you continue south you’ll come to a room with a dais and a number of spiders, including a Crystal Eater. Kill them, then investigate the cobwebs in the west corner. You can:
- Use a Hammer and Chisel to widen the path, in which case you are attacked by a small group of spiders. Interestingly, despite using a hammer and chisel, a Flint and Tinder will be removed from the stash instead.
- Someone with Might 16 can break the webs, in which case you are attacked by a small group of spiders.
- Slither underneath, in which case you are not attacked.
Pass through the tunnel if you haven’t already, and you’ll be transported to a hallway. Use caution: your party’s marching order will be reversed, and there is a poison gas trap immediately behind you. Let the onrushing spiders trigger it for you while you reverse in-place.
Proceed down the hallway and around the corner. You will come into a chamber that houses Nridek, the spider queen, a vithrack who seems to be capable of some telepathic communication. (Benevolent 2 and Grieving Mother will both provide additional dialogue here.) If you offer peace, Nridek leaves. The only way to get the soul vessel is to kill Nridek. You can get Cladhalíath without fighting her but you do not get the additional enchantments. There is also a hidden cache in one of the spiderwebs along the walls of this chamber.
You can bring the vessel back to the room with the dais. Following the directions, send one party member to stand on each of the glowing symbols. Then send your avatar onto the dais. After a brief and painful ritual, you can then use the urn to enchant the spear with the pre-chosen bonuses.
Lower level
The lower level is inaccessible while the gorge is flooded. Upon completion of Act II, the water will recede and the lower level can be accessed either via the cave in the southwestern corner of Stormwall Gorge, or via the upper level of the dungeon by using a Rope and Grappling Hook on the collapsed staircase immediately southwest of the entrance. If any party members have less than 2 Athletics, the character with lowest score gets a Swollen Eye. After this, the party may freely travel between the two levels unhindered.
This level is fairly unremarkable, except for the hidden switch that opens a secret room in the east. You’ll find some spirits, some Trolls, and some Sporelings. There’s an exit to the bottom of Stormwall Gorge in the far west.
If you have started Bounty: Glasdial, he will appear here.
Usage[]
Skills come to play in a variety of different contexts and partially determine
how the player character or their followers can interact with the world around them.
Notably, only the Watcher’s skills are taken into account in dialogue (i.e. a dialogue option that requires 8 Lore won’t be available to a Watcher with 7 Lore, even if they have Durance with 12 Lore in the party). Other party members can use their skills in regular gameplay (the game will automatically select the character with the highest applicable score whenever eg. Mechanics are used) and scripted interactions where it’s possible to select a character to carry it out (i.e. retrieving the dragon egg during Nest Egg, where you can pick a character with a high Athletics score).
Effects
| Skill | Purpose | Gameplay effect | Use in interactions and conversations(based on the in-game description) |
|---|---|---|---|
| Stealth | allows characters of any class to attempt to avoid being seen or heard | Can stay close to NPCs in scouting mode for a longer period without being seen | |
| Athletics | Once per encounter, characters with Athletics can use the Second Wind ability to recover lost Endurance. A higher Athletics score increases the effect of Second Wind | Used in interactions that require physical exertion, such as climbing, jumping, running, or swimming. | |
| Lore | A character’s accumulated miscellaneous knowledge and trivia, often of occult or esoteric topics |
Lore allows characters to use scrolls. Which level is available is determined by dividing the Lore score by 2 (with a minimum of 1). As such:
|
For picking up on relevant historical or cultural contexts, contributing general knowledge, or using own mastery of lore in conversation. |
| Mechanics | Makes it easier to open locks, find and disable traps, and place traps of your own.
Also needed to find hidden loot and switches, as neither Perception nor Stealth do this. |
This skill allows you to disarm traps and pick locks. If the difficulty level is equivalent or lower than the Mechanics rating, it’s free. If it’s one level higher, it costs a variable amount of lock picks (the higher the level, the more lock picks it needs). Anything above and picking or disarming is not possible. Each level of mechanics also grants +3 accuracy for own traps per level. |
For any mechanical purposes, such as interacting with machines, disarming and arming traps or mechanisms, etc. |
| Survival | Allows characters to choose from a variety of long-term bonuses each time they camp. | The first six ranks grant the following bonuses:
Note: After 6th rank, the previously earned bonuses become more powerful in the same order they were received (for a max of 3 levels of bonuses). |
Used in wilderness challenges, and for contributing specialized knowledge of nature or alchemy. |
Notable uses in Pillars of Eternity[]
Quest dialogs
In quest related dialogs the player’s Survival score may unlock options as a result of his knowledge about things related to the environment and how to deal with its dangers.
| Quest | Location | NPC | Description | Survival required | Other requirements |
|---|---|---|---|---|---|
| Clandestine Cargo | Ondra’s Gift | Imatl | ? | 7 | |
| Blood Legacy | Dyrford Village – Dracogen Inn (first floor) | Lord Harond | Tell him there are better roads to Eina’s Rest than travelling through Dyrford. | 5 | |
| Blood Legacy | Dyrford Village | Hendyna | Know, she’s speaking of pregnancy when asked about Lady Aelys. | 4 | |
| A Farmer’s Plight | Dyrford Crossing | Korgrak | Tell him he can’t hide here any longer. | 9 |
Other dialogs
In dialogs, not related to certain quests, the player’s Survival score may as well unlock additional conversation options.
| Location | NPC | Description | Survival required | Other requirements |
|---|---|---|---|---|
| Copperlane – The Goose and Fox | Kaenra | Have more detailed knowledge about svef when talking about her fiancé’s old self. | 2 | |
| Copperlane – Scriveners’ Dormitory | Coren | Guess he used some drugs. | 2 | |
| Endless Paths of Od Nua Level 2 | Barely living xaurip, lying on the floor in the northernmost chamber | Examine it and find skin discolorments and ritualistic paint applied, additionally signs of a certain poison coinciding with the paintings. (Less detailed results possible with only .) | 5 |
Eothas’ death and return[]
| “ | I only wish to destroy the darkness that surrounds the gods, that you may better see us for what we are. | ” |
| ~ Eothas |
Eothas, who contains aspects of both death and rebirth, is said to love kith the most. He came to the conclusion that the gods needed to step aside to allow kith to succeed (or not) on their own and to expose the gods true nature. He decided he needed to «break the foundations of belief itself, to extinguish the lights that maintain the illusions we have created».
The Saint’s War
Main article: Saint’s War
To expose the truth of the gods origin, Eothas entered the body of a willing farmer from Readceras named Waidwen. Waidwen gained a following and was quickly named the «Divine King» ruler of Readceras. In 2807 AI, Readceras invaded The Dyrwood.
Afraid of what Eothas would do, Magran (after being goaded by Woedica) assisted a group of Magranite priests from Ashfall in creating the Godhammer Bomb. The bomb was used against Waidwen at Halgot Citadel after luring the Readceran unit across the bridge. The explosion destroyed Waidwen and Eothas, although the body was never found.
Return
This article or text contains significant spoilers relating to the story of Pillars of Eternity II: Deadfire.
This article or text contains significant spoilers relating to the story of Pillars of Eternity II: Deadfire.
In 2828 AI, Eothas summoned enough strength to take control of the statue of Maros Nua (located below Caed Nua) in The Dyrwood. The event caused great destruction in the area, killing over 300 people and nearly killing The Watcher.
Eothas then marched across the ocean to the Deadfire Archipelago. Although some of the other gods tried to stop him, he eventually made his way to the lost city of Ukaizo and successfully destroyed the great machine the Engwithans had built to control the flow of the Wheel. In breaking the cycle of rebirth, he believed «it will force all of us to face the truth. We will fail together or move forward together. Either ending is preferable to the cycle we still find ourselves in.»