[решено] steelseries gg (engine) не работает в windows
Содержание:
Steelseries Engine Software troubleshooting
Here are some common issues that arise with Steelseries Engine, generally, it’s a pretty reliable piece of software so hopefully you don’t run into any of these issues, if you do however, here are some proposed fixes.
Not opening or loading
I haven’t run into this issue so far, make sure that Steelseries Engine isn’t hidden somewhere, try to run Steelseries Engine, if don’t see the window, right click the app icon in your menu and try to maximize.
Try doing the following to the .exe file
- Locate file: SteelSeriesEngine3Client.exe ( C:\Program Files\SteelSeries\SteelSeries Engine 3 )
- Right mouse button -> “Run With Graphics Processor” -> change your video card (I had to select INTEGRATED)
A restart might also fix your issues.Last thing to try is to uninstall and reinstall or update your install of Steelseries Engine.
Steelseries Engine not detecting mouse/keyboard/headset
First off you should double check to see if your device is compatible, if it’s not compatible you’re out of luck, you could always get a new Steelseries mouse, the Rival 310 is a pretty nice mouse!
Try this terminal command
enter ” netsh winsock reset ” in the terminal as admin
Try going to your windows device manager and reinstalling drivers for your USB device, having a fresh device might trigger detection in Steelseries Engine
If you know you have a compatible device try updating Steelseries Engine if there’s one available.
Make sure to restart your machine and check if the device works on reboot.
Lastly, again is to do a fresh install, uninstall all instances of Steelseries Engine and reinstall, download a fresh installer from https://steelseries.com/engine
Steelseries engine audio changes not working
This usually means there’s another audio driver conflicting with Steelseries Engine, try disabling other audio profiles from Realtek, Razer, Dolby, etc.
What is Steelseries Engine Software?
Steelseries Engine is the software that powers the customization, tuning and settings of all modern Steelseries hardware. Steelseries Engine supports both Windows and Mac OS.
High level features of Steelseries Engine:
- You can sync your profiles in the cloud optionally if you create a Steelseries account to enable Cloudsync
- On supported games, some devices have automatic configurations that can change what is displayed based on the status of your game, they call this Gamesense
- Dota 2
- CS:GO
- Mortal Kombat 11
- Minecraft
- On mice with vibrations, you can set tactile alerts
- Prismsync allows you to sync all of your devices with one consistent lighting setting
- Plugin Apps can enable some integration with your OLED screens, most notably Discord, Tidal and Spotify
Страница 4: Программное обеспечение — SteelSeries Engine 3
Программное обеспечение — SteelSeries Engine 3

SteelSeries предлагает программу SteelSeries Engine 3 с весьма дружественным интерфейсом, которая совместима с различными продуктами SteelSeries. Впрочем, большинство крупных производителей игровой периферии тоже предлагают подобные универсальные решения. Здесь можно упомянуть Gaming Software от Logitech, Corsair Utility Engine (CUE) от Corsair или Razer Synapse. А SteelSeries предлагает Engine 3. На первой вкладке приводится суммарная информация о продуктах SteelSeries в системе. При выборе продукта открывается новое окно. Как обычно, пользователь может настроить привязку кнопок, два уровня регулировки DPI, подсветку, частоту опроса, активировать Angle Snapping и т.д. Присутствует и редактор макросов. В случае Rival 700 после нажатия на пункт OLED открывается отдельное окно, в котором можно загрузить картинки или анимацию для отображения на дисплее OLED.
В основном окне Engine 3 кроме первой вкладки присутствуют еще две. Вторая вкладка посвящена профилям для разных игр. Последняя вкладка GameSense, с одной стороны, весьма инновационная. С другой стороны, самая противоречивая. При активной функции GameSense программа Engine 3 определяет запуск определенных игр и автоматически загружает профили. Только данные профили открывают возможность использования всех функций мыши. Например, профили настраивают подсветку под игру, тактильную отдачу и дисплей OLED. Так, цвет подсветки может меняться от красного до зеленого в зависимости от здоровья персонажа. А при низком уровне здоровья может добавиться вибрация сердечного ритма. На дисплей, например, можно выводить рейтинг K/D (отношение между количеством убитых врагов и собственных смертей игрока). Функция GameSense была представлена летом 2015 года с поддержкой игр CS:GO и Minecraft. Но если SteelSeries хочет добиться широкого распространения своей технологии, то и число поддерживаемых игр должно быть больше. После объявления GameSense был добавлен единственный профиль для DOTA 2 (который на нашей тестовой системе так и не заработал). Нельзя сказать, что SteelSeries активно развивает GameSense.
Кроме того, GameSense – не единственное решение, автоматически скачивающее и активирующее профили для разных игр. Самая большая библиотека игр сегодня наблюдается у Razer Chroma Workshop. В библиотеку официально интегрированы 25 игр, но через сообщество разработчиков обеспечивается поддержка большего числа игр. После загрузки профиля программа автоматически настраивает подсветку поддерживаемых продуктов Razer, в том числе мышей или клавиатур. Конечно, SteelSeries дает больше аппаратных средств: RBG-подсветка, тактильная отдача и (в случае Rival 700) дисплей, но все осложняет скудная поддержка игр.
<> SteelSeries Rival 700 в деталяхТесты и заключение
Кнопки и колёсико
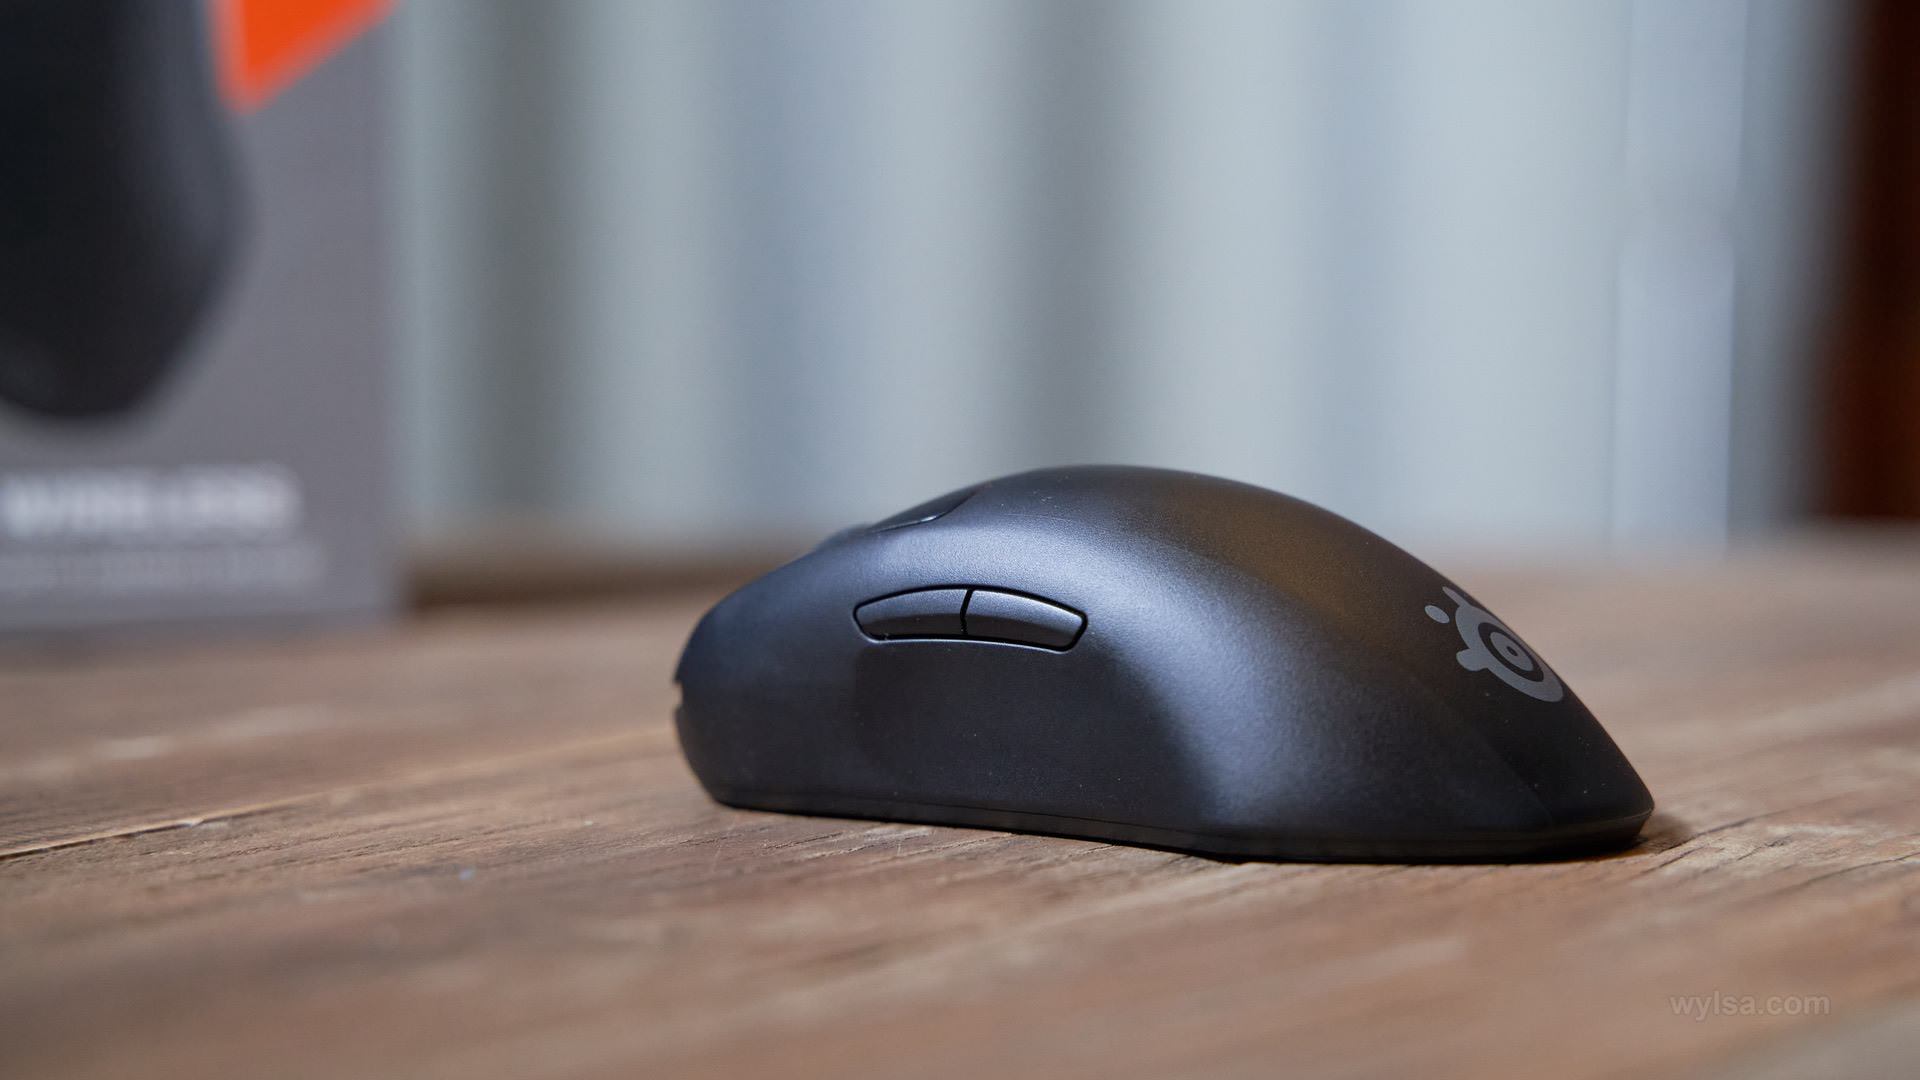
Корпус по меркам класса игровых мышек выглядит просто и минималистично: две крупные кнопки с громким кликом, две небольшие клавиши на левом боку. Зато подсвечивается колёсико — таким образом можно настроить оформление под свой стиль игрового компьютера, разнообразие никогда не повредит.
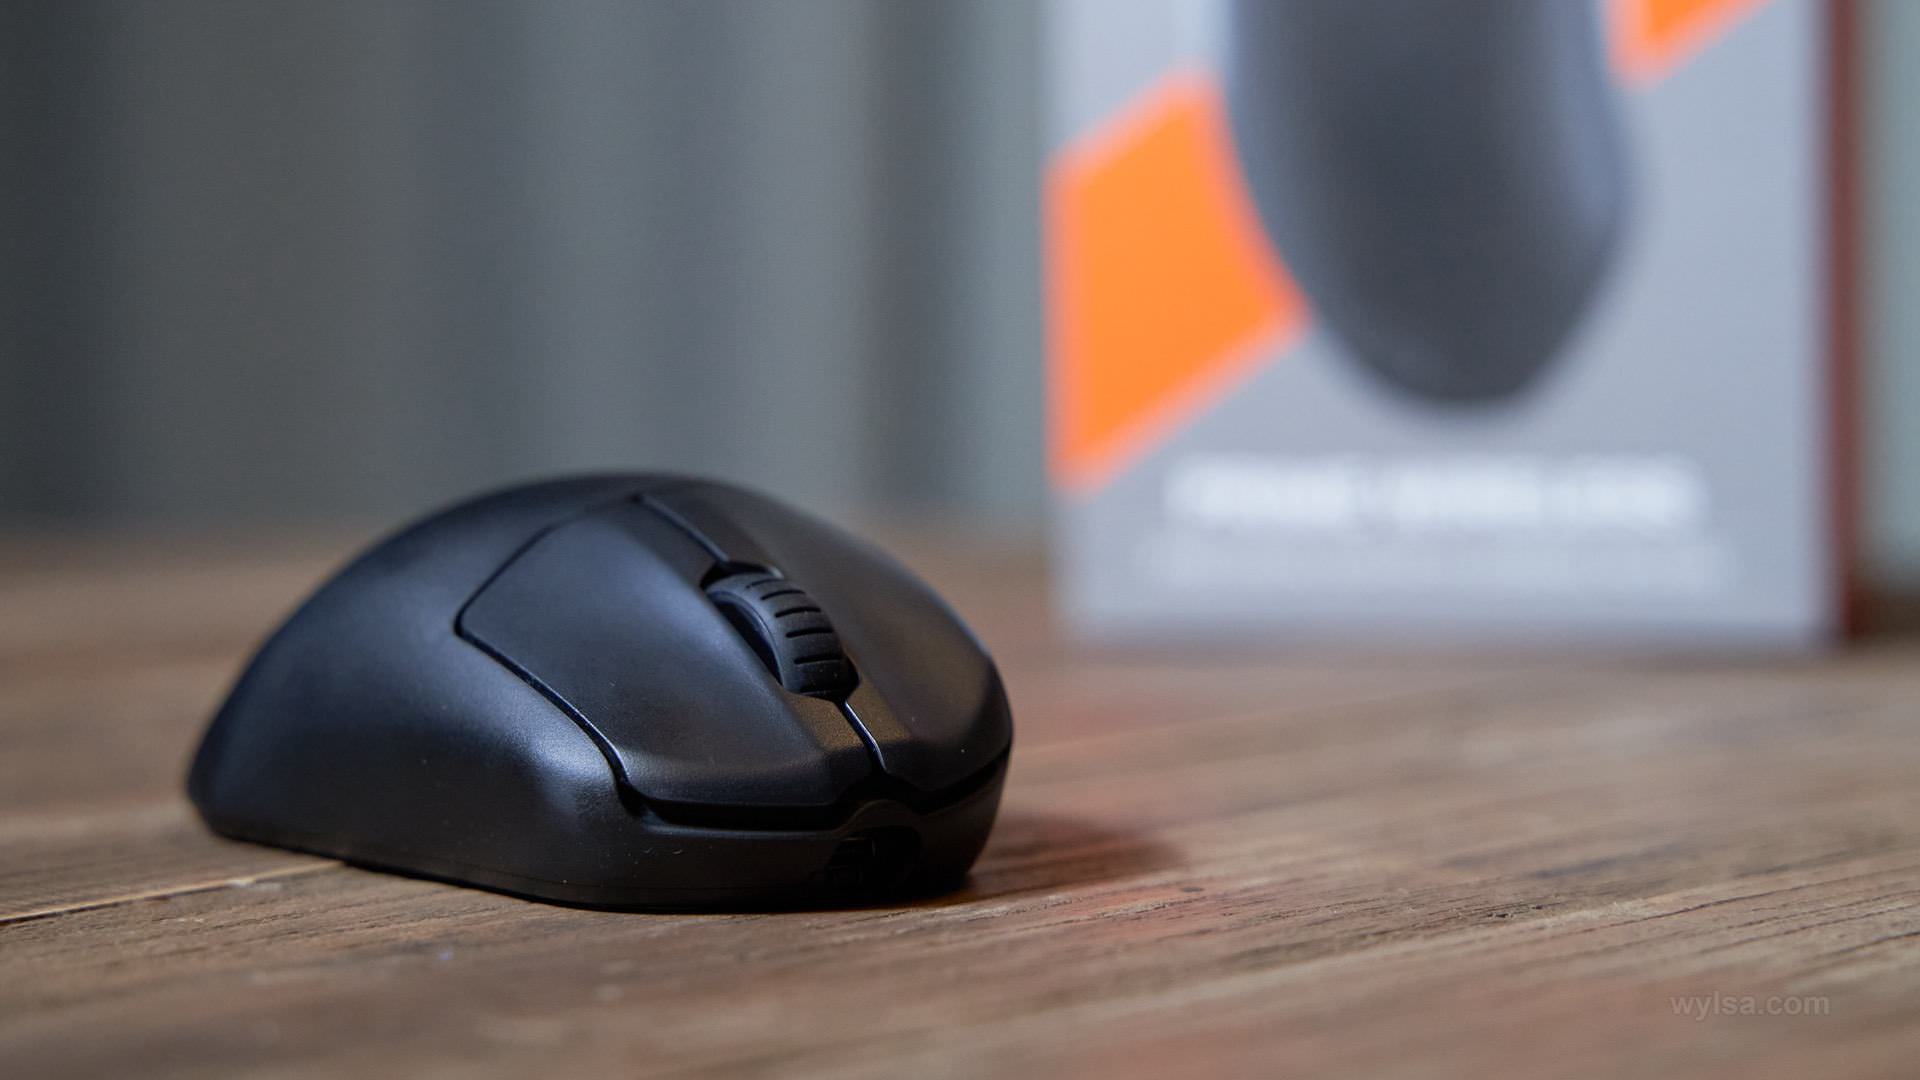
У колёсика упругий ход: свободная прокрутка исключена, листать длинные списки может быть даже утомительно. Зато клик чёткий, ход прогнозируемый и точный. Если психануть и вдарить от души мышкой об стол, то кнопки не отвалятся да и случайных кликов не будет. Вандализм разумной степени она выдерживает.
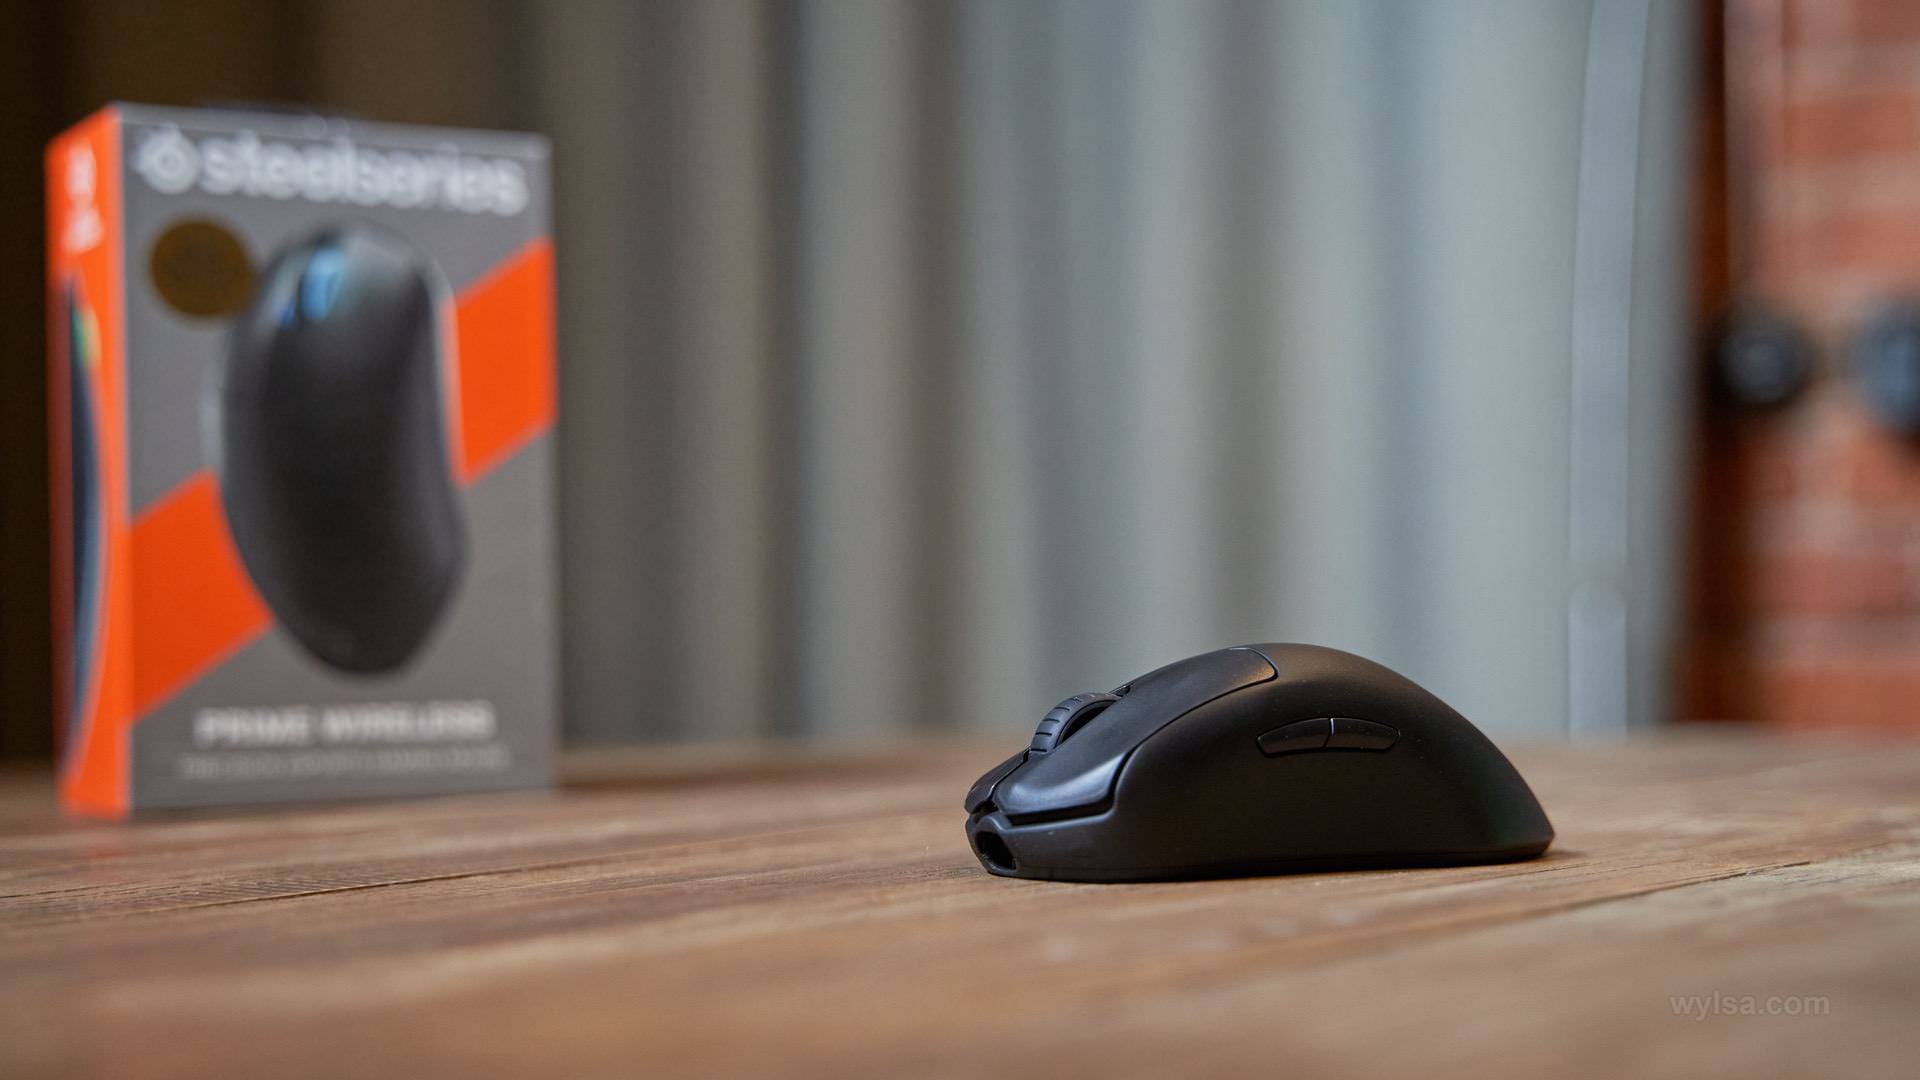
Корпус полностью выполнен из матового пластика, он не пачкается и быстро очищается. Пластик с едва ощутимой текстурой — на фотографиях может казаться гладким.
Using Steelseries Engine 3 Software – Features
Mouse Profiles & Configs
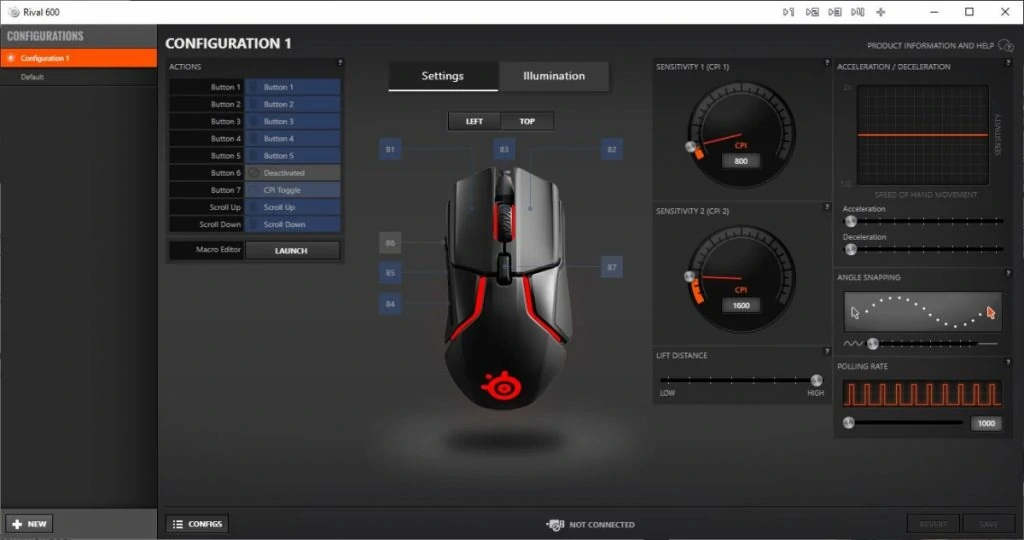
Creating profiles is easy in Steelseries Engine, in the bottom left corner you can click on the config button to create new profiles for each device that Steelseries Engine supports. You can set when these profiles are enabled by which software you have running on your computers.
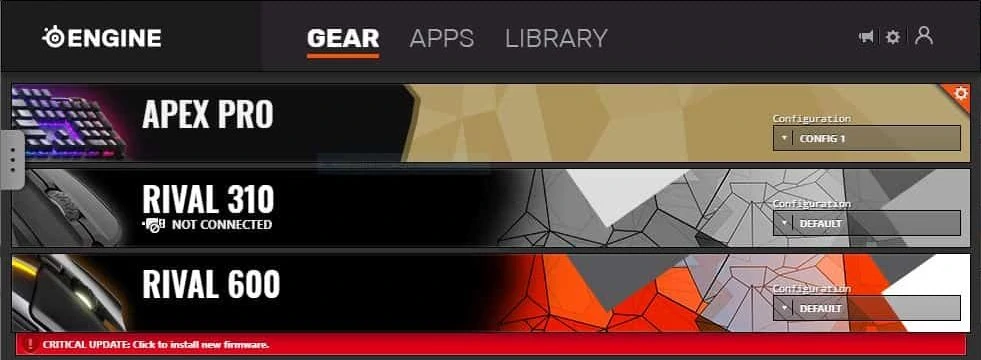
From the main screen you can set the default profile for each device.
Mouse key binds
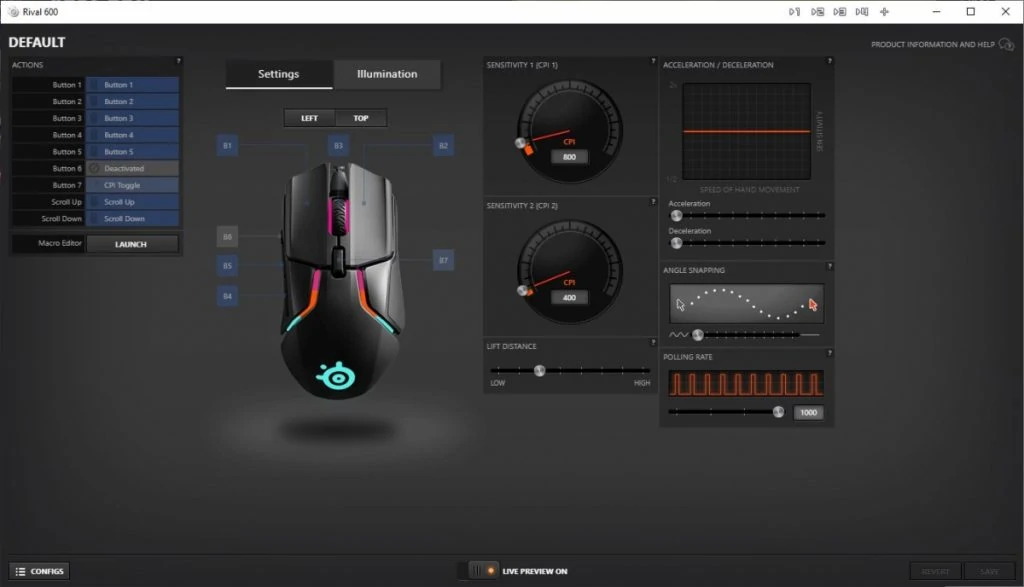
On the left side, clicking on the blue squares will pop-up a menu where you can rebind the button to any other mouse button, keyboard button, system function or recorded macro. You can also set the mouse to activate that bind only once, a set amount of times or repeatedly.
On the right side, you can set sensitivities, lift off distance, acceleration, angle snapping and polling rate.
Mouse Lighting
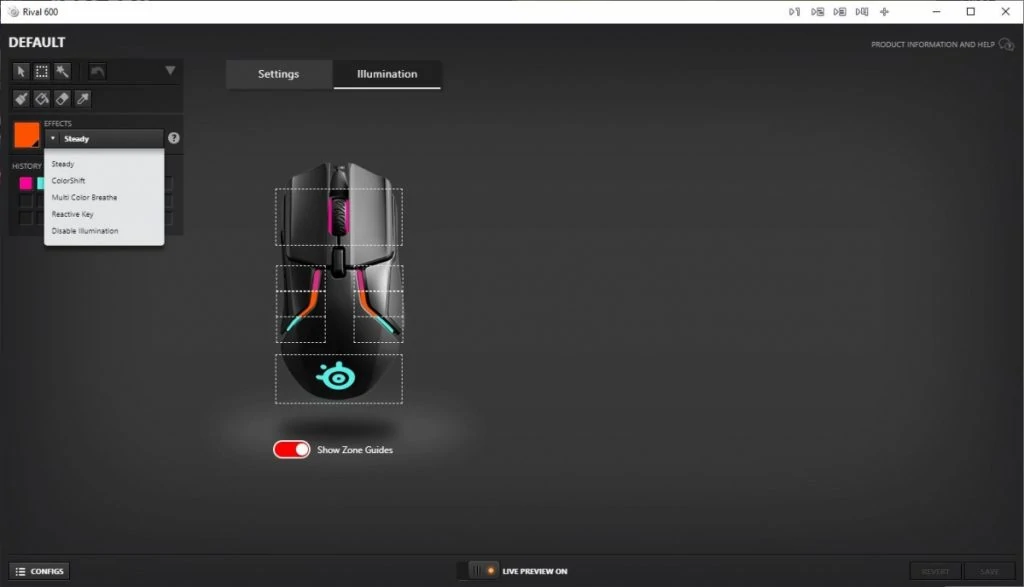
Steelseries Engine probably has my favourite lighting configurator, you can set each of these boxes individually or drag-select several boxes at once to set them all at the same time. The effect of each of these zones is really smooth on mice. The top left you have access to photoshop like settings where you can copy and paste settings from one zone and apply them to another.
A history of colour palettes lets you keep track of what you’ve tried.
Keyboard Profiles & Configs
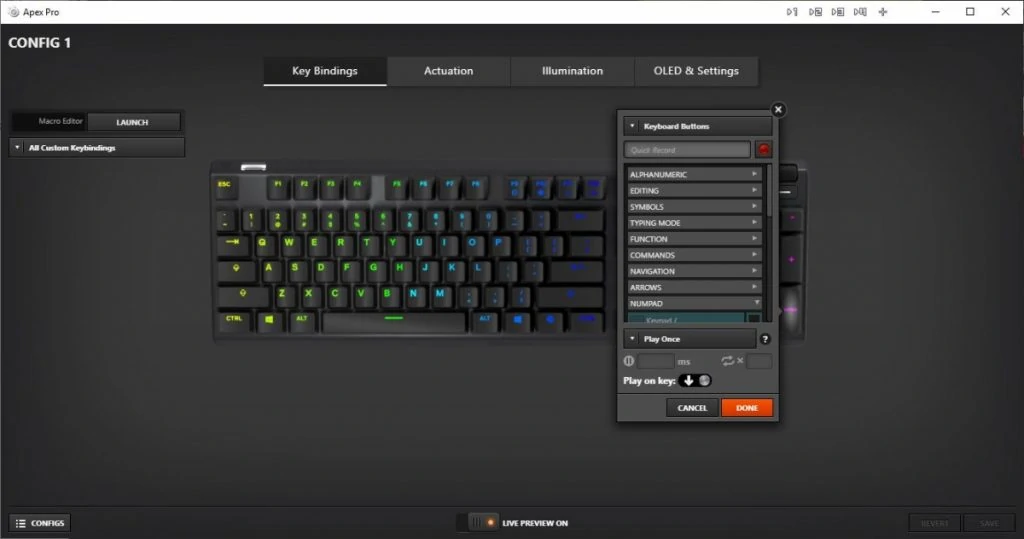
Similar deal for keyboards, you can click on any of the keys on the keyboard and a pop-up menu will reveal allowing you to rebind the key whatever you want. Same options as mice, you can set the key bind to happen once per press, a set amount of presses, or repeatedly on hold or tap.
Keyboard Actuation
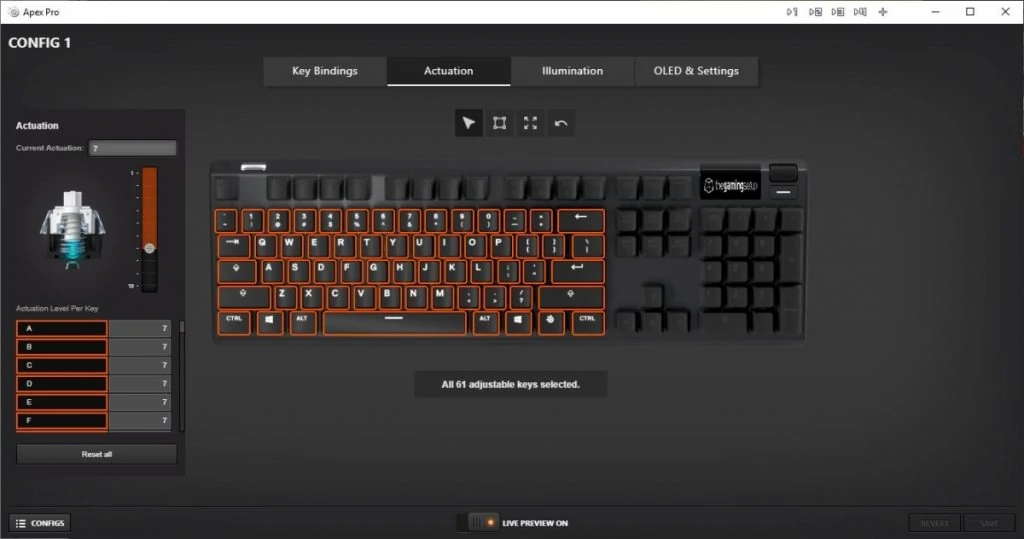
If you have a Steelseries keyboard like the Apex Pro, you’ll have the option to set per-key actuation distances, the UI is very similar to the keybind UI, select the key and set the setting on the left.
Keyboard Lighting
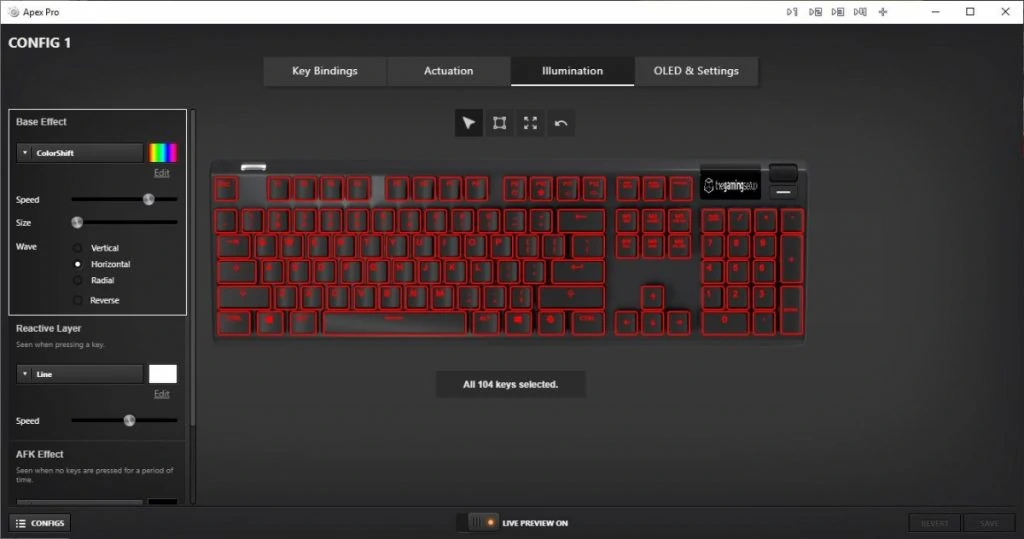
Steelseries Engine brings the same drag-select feature to the keyboard side, where you can set a bunch of specific keys all at once. You can also shift-click to select individual keys in a group.
On the left hand size, you can set a base effect for the keys and a reactive layer, meaning what happens when the key is pressed.
For the base layer you have the following options:
- Single Color
- ColorShift
- Gradient
- Breathe
Engine also has a bunch of preset colours to choose from.
Gradients are also very nice in Steelseries Engine allowing you to set 10+ points in your gradient to make really funky color ways.
The reactive layer has the following options:
- Line
- Ripple
- Fade
The same awesome gradient editor is also present for editing colours on the reactive layer.
Finally, SS Engine has the option to set an AFK colour mode to save some eyeballs when you’re not using it. The same base effects are available here with a timer setting to indicate AFK.
OLED Settings
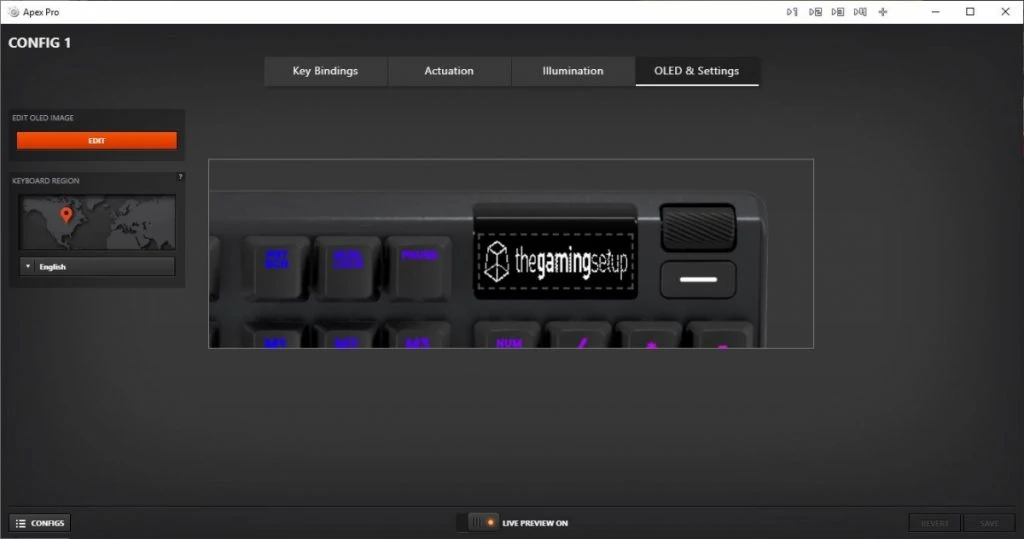
If you have a Steelseries device that has an OLED screen on it this is where you set up what you want it to display. Steelseries Engine allows you to browse your computer and select an image file, it’ll convert that image into a black and white image compatible with your mouse or keyboard and convert animation with 10 frames of animation.
You can also configure the OLED to display situation information if you have compatible software like Discord or Spotify or games like Dota 2 and CS:GO.
How to record macros
Find the macro editor on the settings tab of one of your device settings. Hit the launch button to open a new macro editor window.
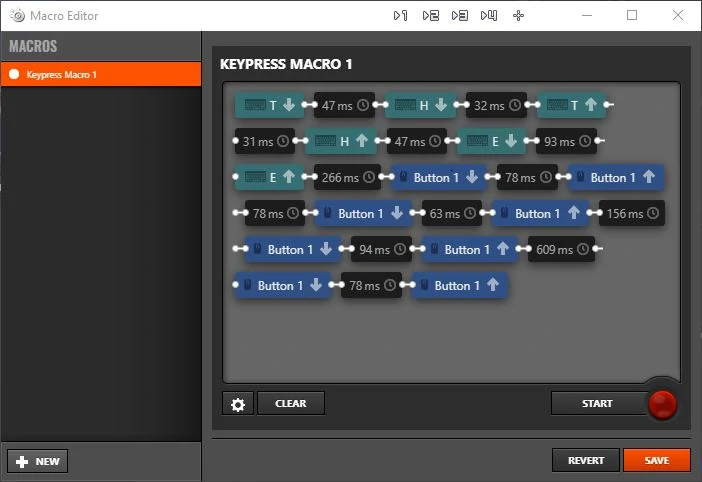
The UI from here is pretty straight forward, on the left hand side you can create new recordings, the bottom right lets you trigger a macro recording session. Once you hit the red button, the delays between your key presses and mouse presses are recorded, hit the red button to stop recording, hit save to store your macro and allow it to be assignable to any single button.
Точная и быстрая
На «животе» расположено несколько гладких тефлоновых наклеек для плавного перемещения мышки по поверхности. Также на нижней части корпуса находится физическая кнопка, меняющая пять стандартных уровней чувствительности по нажатию. При настройке меняется цвет колёсика: 400 CPI — фиолетовый, 800 — голубой, 1200 — зелёный, 2400 — жёлтый, 3200 — красный. Если зажать эту же клавишу, можно выбрать один из четырёх вариантов частоты опроса: 125 Гц — голубой, 250 Гц — зелёный, 500 Гц — жёлтый, 1000 Гц — красный.
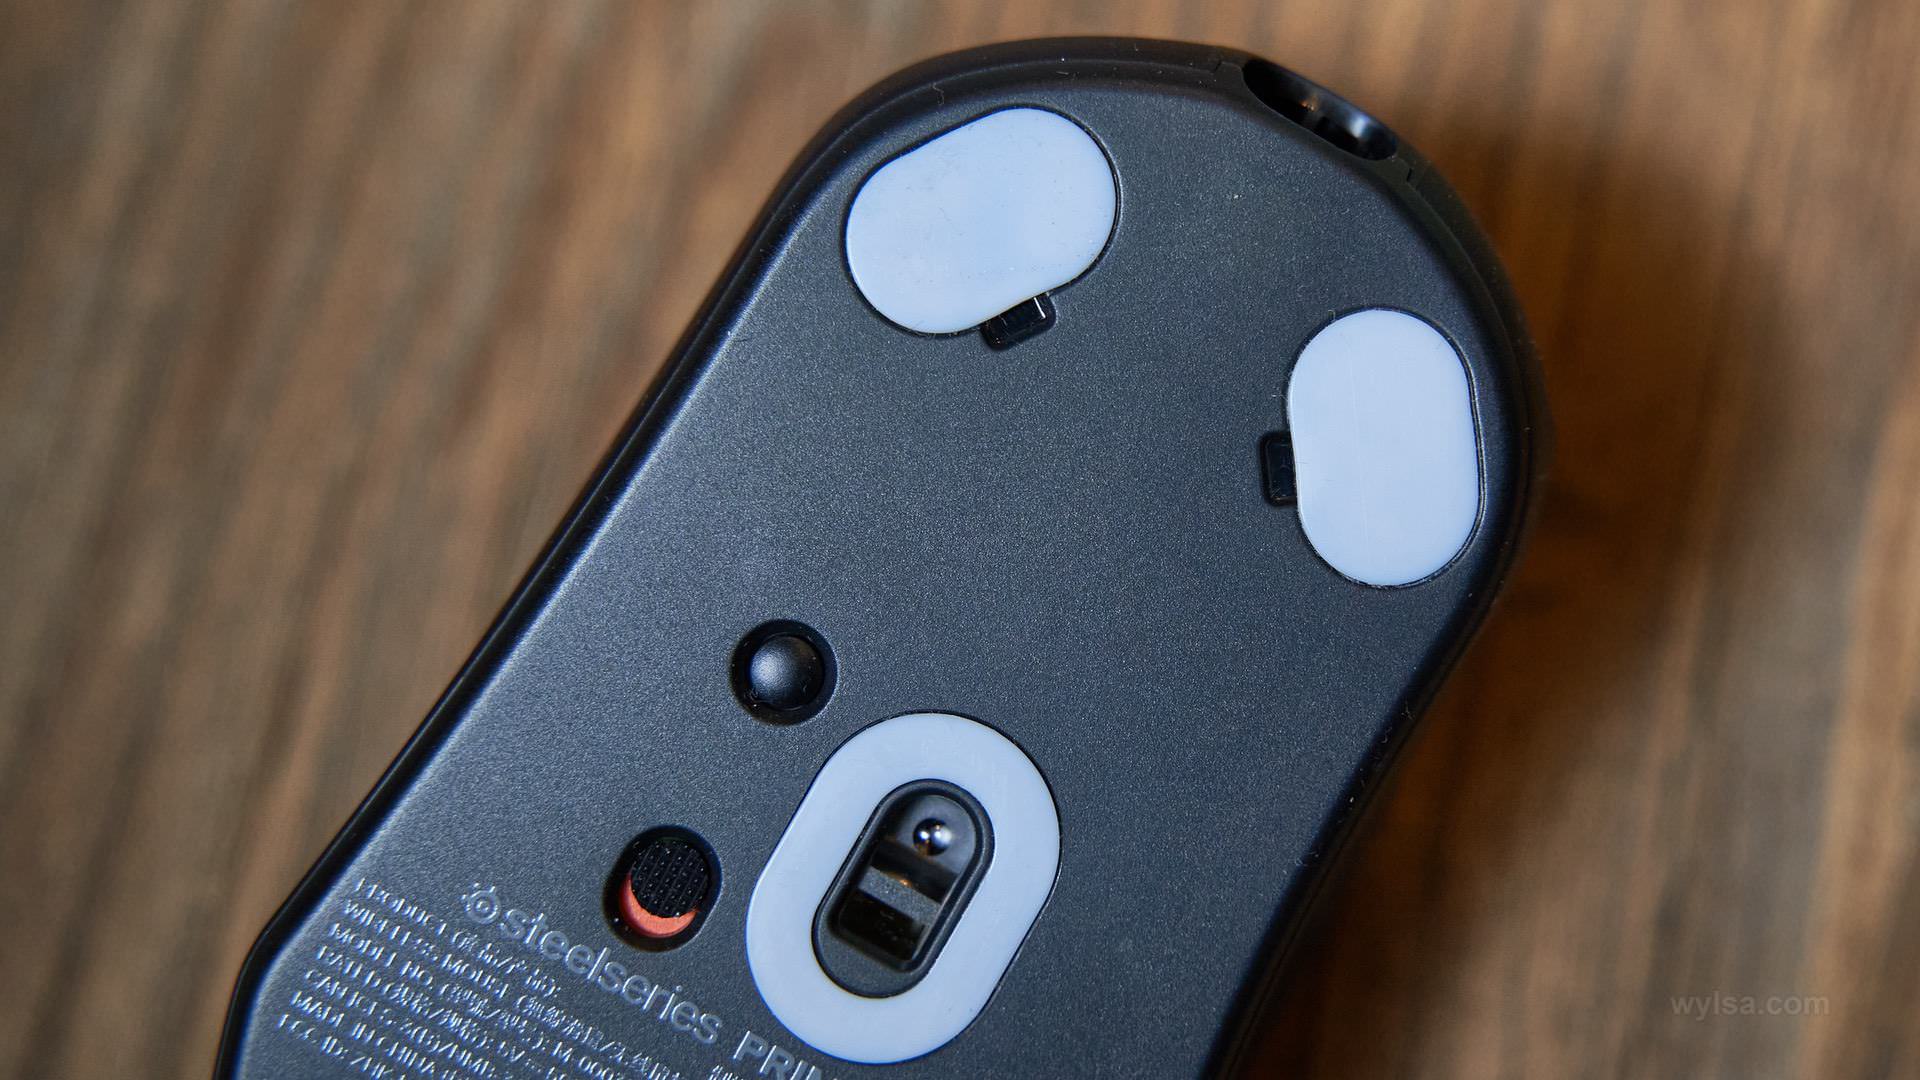
Мышка работает стабильно и быстро, флагманская игровая мышь доказывает свою цену и назначение. Характеристики впечатляющие: топовый сенсор TrueMove Air, оптические магнитные переключатели Prestige OM выдерживают до 100 млн кликов, беспроводное подключение Quantum 2.0 Wireless работает без задержек. Кнопки срабатывают чётко, реакция сенсора быстрая и точная.
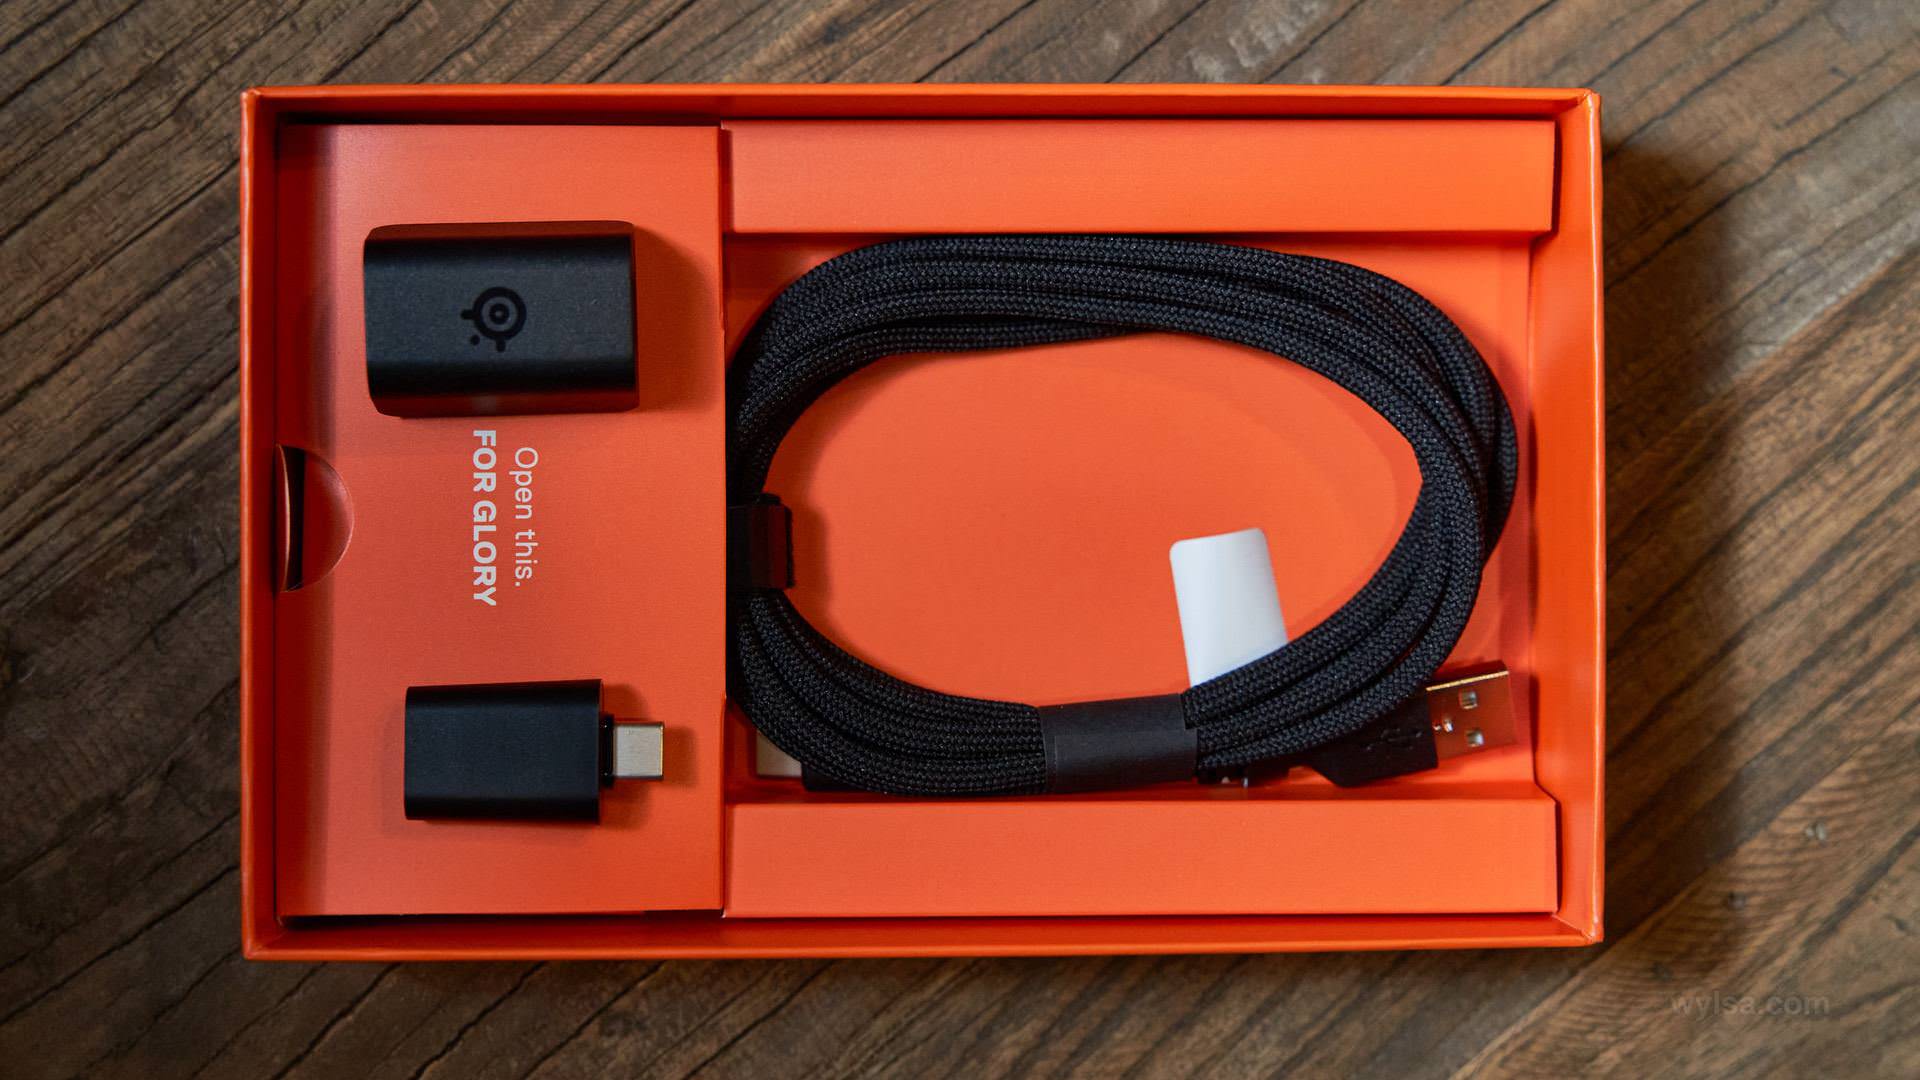
На одной зарядке мышка держится до 100 часов, поддерживается быстрая зарядка. Мышка заряжается через порт USB Type-C, разъём утоплен в корпусе, но проблем с подключением кабеля не было. Я пробовал и комплектный, и несколько других подходящих по типу проводов в студии, всё было в порядке.
На всякий случай отмечу, что мышка без Bluetooth!
 Иллюстрация: Светлана Чувилёва / Wylsacom Media
