Pickups
Содержание:
Chest Destruction[]
Chests can be destroyed by shooting them. This will often cause them to drop inferior loot, such as pickups, items or Junk. They may instead explode, damaging the player if they are too close.
Destruction Tables
| Payout | Weight | Notes | |
|---|---|---|---|
|
0.45 |
Has a 20% chance to be replaced by Ser Junkan if he has not already been unlocked.
Weight is multiplied by 3 if the player has at least one .Weight is also multiplied by 1.5 if the player has Ser Junkan. |
|
| Half Heart | 0.2 | N/A | |
| An Explosion | 0.1 | N/A | |
(If Unlocked) |
0.005 | Weight is multiplied by 3 if the player has Ser Junkan. | |
(If Unlocked) |
0.05 | N/A | |
|
Random Item or Gun with a downgrade in quality |
0.25 | If this is rolled, a gun/item is spawned with a random downgrade in quality relative to the chest tier. |
The chance of a payout is equal to the payout’s weight divided by the sum of the weights of all possible payouts.
Notes
- Brother Albern’s Truth Chest does not conform to normal Chest Destruction rules. It is incapable of paying out with an Item, a Half Heart, or an Explosion, and its Junk Weight is always set to 1.0. In addition, if it attempts to pay out with Junk, it will instead pay out with Lies
The payout weight of Junk and Gold Junk in the Truth Chest are not affected by the player’s key count, or whether or not they have Ser Junkan.
, and if it attempts to pay out with a random downgraded Item or Gun, it will instead pay out with what it would have had the chest been opened.
- When the game attempts to pay out with a half heart upon chest destruction, it will occasionally drop a different pickup. The cause of this is unknown.
- Broken Revival Chests do not have payout tables, and instead simply revive the dead co-op partner.
- tier chests cannot get a downgrade in quality, and will thus always drop a item/gun if that is rolled through the Chest Destruction loot table.
- Enemy and companion bullets cannot break chests, only the player’s bullets can.
- Rat Chests cannot be broken.
Story[]
Past Kill
If the Bullet That Can Kill The Past is used on The Bullet, they will be brought back to the Gungeon Proper in an unspecified time in the past. The Bullet retrieves Blasphemy from a dying elder bullet. The Bullet travels forward in the Gungeon and faces two Chain Gunners, followed by Agunim and finally Cannon. After successfully defeating the two and thrusting the wooden Blasphemy into Cannon’s head, the true Blasphemy is created in a burst of fire and light. Following this is a final scene where the Bullet is seen resting on a wood stump in some meadow-like area while various Gungeon enemies are seen cheerfully playing about.
Defeating the Bullet’s past will unlock the Chicken Flute.
Exit the Gungeon
Alongside the other gungeoneers, the Bullet must fight to escape the now collapsing Gungeon. At the end of the game, instead of embarking onto the Sword and fleeing with the other Gungeoneers, the Bullet chooses to stay, and watches the other Gungeoneers escape, as well as watching the Gungeon continuing to collapse.
NPCs[]
Over the course of the game, various characters can be saved from the Gungeon Proper. Many of them will move up to The Breach and offer various services.
Drunkard
The Drunkard sits next to the entry for the Hall of Knowledge. Once in a while, after players finish a run, he will tell them stories about the bosses players defeated or about the NPCs of The Breach.
Ox and Cadence
Ox & Cadence will set up and run a shop in The Breach that allows players to spend to unlock new items and guns that will spawn in the Gungeon below. They are located left next to the entrance of the Gungeon.
Professor Goopton
Professor Goopton runs a shop in The Breach that allows players to spend Hegemony Credits to unlock new liquid-themed items and guns.
Doug
Doug occasionally shows up in The Breach and runs a shop that allows players to spend Hegemony Credits to unlock new items and guns.
Tinker
The Tinker can first be met after a flawless victory against one of the bosses of the Keep of the Lead Lord. He’ll settle in the lower right of the Breach and once a shortcut has been unlocked, he’ll move inside the elevator room. Whenever he’s spoken to after a new shortcut has been finished, he’ll reward adventurers with a new unlock.
See Shortcuts for more information.
Daisuke
For 6 (or 1 if the player has attempted and failed Challenge Mode 30 times), Daisuke will enable Challenge Mode for the player’s next run.
Frifle and the Grey Mauser
Frifle and the Grey Mauser are two hunters that will reward adventurers for killing a certain amount of one enemy, one quest at a time. Whenever a hunting quest is completed, they will reward the player with Hegemony Credits and a new unlock.
Gunsling King and Manservantes
A royal adventuring for entertainment and his trusty manservant pack-mule. If spoken to after winning 10 wagers against them in the Gungeon, they will reward the player with the Owl.
Blockner
Once Manny has been told about Blockner’s defeat, Blockner’s ghost will move close to the entrance of the Hall of Knowledge. He has some dialogue with Manny who will also be present outside.
The Lost Adventurer
The Lost Adventurer will move into the Breach after the player has helped him map out every floor. He gives the player hints on how to find certain secrets.
Winchester
Winchester stands in a corner and comments on the player’s persistence. Winning his trickshot challenges will increase his sympathy for the gungeoneers.
Ledge Goblin
The Ledge Goblin sits on a ledge next to her helmet. If the player interacts with the helmet, it will fall off the edge and the Ledge Goblin will re-enter the Gungeon to retrieve it. After kicking the helmet and saving the Ledge Goblin three times, the player will be rewarded with a new unlock, the Blast Helmet.
Tonic allows the player to toggle Turbo Mode once he is rescued.
Bowler allows the player to toggle Rainbow Mode once he is rescued.
List of Achievements[]
| Icon | Name | Description | How to Obtain |
|---|---|---|---|
| Passing My Test | Completed Manuel’s Test, A Great Achievement. | Finish the Tutorial. Unlocks «The Rookie» hat. | |
| Win | Successfully Exited The Gungeon. | Win the game as any character. Unlocks Dragunfire. | |
| Bull In The Heather | Mastered The Coltaur. | Defeat the Buffammo five times. | |
| Dethroned | Mastered His Majesty’s Chancellor. | Defeat His Majesty’s Chancellor five times. Unlocks Crown of Guns. | |
| Hollow Victory | Mastered The High Priest Past. | Defeat the Low Priest five times. | |
| Six Six Six Gun | Mastered The Chamber Of Flame. | Defeat the Killinder five times. | |
| Smash Brother | Mastered The Mecha Bullet. | Defeat Mutread Head five times. | |
| Set In Stone | Mastered The Medusalier. | Defeat Medusalier five times. Unlocks Siren. | |
| Gato Roboto | Mastered The Meowitzer. | Defeat the Meowitzer five times. | |
| Ouroboros | Mastered The Bolt Python. | Defeat the Bolt Python five times. | |
| Behold, Again | Mastered The Armored Beholster. | Defeat the Eyebalrog five times. Unlocks Eye of the Beholster. | |
| Death From Below | Mastered The Deathvator. | Defeat the Fallmonger five times. | |
| Shrine On | Mastered The Kill Shrine. | Defeat the Sepulchergeist five times. | |
| Four Guns | Mastered Gungamesh. | Defeat Gungamesh five times. | |
| The Last Boss | Mastered The Lich Dragun. | Defeat The Last Dragun five times. Unlocks Riddle of Lead. | |
| Elevated Enlightenment | Accessed All Elevator Types. | ||
| Breakout | Rescued All Npcs From The Cell. | 12 in Hello to Arms Update | |
| Green No More | Aced Just Dessert Golf. | Get a hole in Just Dessert Golf 10 times. | |
| Chester Bester | Aced Winchester’s Game. | Destroy all targets in Winchester’s Original Game 3 times. | |
| Flawless Beginner | Completed Level 1 Boss Without Taking Damage. | Unlocks Vulcan Cannon. | |
| Flawless Journeyman | Completed Level 2 Boss Without Taking Damage. | ||
| Flawless Apprentice | Completed Level 3 Boss Without Taking Damage. | Unlocks Mine Cutter. | |
| Flawless Master | Completed Level 4 Boss Without Taking Damage. | Unlocks Particulator | |
| Flawless Victory | Completed Level 5 Boss Without Taking Damage. | ||
| Man Of Hats | Bought All Hats. | 34 items in Hello to Arms Update | |
| Skin Trade | Bought All Skins. | 14 items in Hello to Arms Update | |
| Getting The Band Back Together | Unlocked All Characters. | Unlock The Bullet, The Robot, and The Cultist. | |
| Big Spender | Bought Something From Bello. | Buy 50 items from Bello. | |
| Year Of The Ox | Bought Something From Cadence And Ox. | Buy 20 items from Cadence And Ox. | |
| Sunset Overdrive | Exited The Gungeon As The Pilot. | Unlocks Disarming Personality and Wingman. | |
| Money, Cash, Woes | Exited The Gungeon As The Convict. | Unlocks Loot Bag and Enraging Photo. | |
| Soldier Of Fortune | Exited The Gungeon As The Marine. | Unlocks Galactic Medal of Valor and Military Training. | |
| Hunter Exit Hunter | Exited The Gungeon As The Hunter. | Unlocks Witch Pistol and Dog. | |
| Blue Screen | Exited The Gungeon As The Robot. | Unlocks Mutation and Blown Fuse. | |
| Sidekick Story | Exited The Gungeon As The Cultist. | Unlocks Banana Jam Hands. | |
| Bullet Time | Exited The Gungeon As The Bullet. | Unlocks Live Ammo and Blasphemy. | |
| Combo Breaker | Reached Max Combo. | Reach a Combo of 20. Unlocks Ser Junkan for appearance as both an item and a powerup. | |
| Lock Steps | Helped Flynt Avoid Embarrassment. | You get the quest after talking to Flynt multiple times.
You can find the items in the minigames from the Resourceful Rat’s balloons. |
|
| Lost in Translation | Helped Goopton With Something Personal. | You get the quest after talking to Professor Goopton multiple times.
You can find the item in the minigames from the Resourceful Rat’s balloons. |
|
| Secure Seating | Upgraded Bello’s Stools. | You get the quest from Bello after the bar is set up.
You can find the stools in the minigames from the Resourceful Rat’s balloons. |
|
| Natural and Artificial Flavors | Sated Daisuke’s Craving. | You get the quest after talking to Daisuke multiple times.
You can find the items in the minigames from the Resourceful Rat’s balloons. |
|
| No Link Cable Needed | Gave The Old Man Something To Fiddle With. | You get the quest after talking to the Old Man multiple times.
You can find the item in the minigames from the Resourceful Rat’s balloons. |
|
| Able | Reunited Old Red with Daisy. | You get the quest after talking to Old Red multiple times.
You can find the item in the minigames from the Resourceful Rat’s balloons. |
|
| Beastmaster | Achieved Beast Mode Level 2. | Talking to the guards in front of the entrance starts Beast Mode discussion. Unlocks «The Beast» hat. | |
| Tentacle Espionage Action | Mastered The Glocktopus. | Defeat Glocktopus five times. | |
| At The Helm | Aced Helmet Kick. | ||
| Octo-Rockin’ | Carried Eight Weapons At Once. | Unlocks Railgun |
Notes[]
- After defeating the Dragun, its body will disintegrate into a skeleton. Its skull will drop onto the platform where the character stands, and the spine will form a bridge to the Aimless void which houses the Gun That Can Kill The Past.
- Shooting the skull until it breaks will drop the Obsidian Shell Casing, used to craft the Bullet That Can Kill The Past.
- Once the player enters the Aimless Void, it’s impossible to go back, so the player has to be careful to get Bullet That Can Kill The Past before they enter, if they need it.
- If the player has Wax Wings, Jetpack, Ring of Ethereal Form, or another item that allows the player to fly and attempts to fly behind the Dragun, he will send down a wall of bullets that forces the player back towards the bottom half of the arena. This will happen regardless of whether the Dragun is actively doing an attack or not.
- If the player has Challenge Mode active, the Dragun will always have Dragun Rage and High Stress active, which makes the Dragun much more difficult.
- If the player has accumulated Curse, the knives thrown by the Dragun can be Jammed.
- The hallway to the Dragun makes the vision zoom away from the player. If the player stops only a few steps from the animation, they can teleport into another room, keeping the vision zoomed out for an advantage.
- The rocket he fires can be hit back with Casey, though it won’t actually do any damage.
- With Bloodied Scarf, the player can retreat off screen by dodge rolling downward at the corridor leading to the arena, which grants immunity to some attacks.
- After defeating the Advanced Dragun, the base of the statue in the Breach turns into the Advanced Dragun’s head.
- Any Items that are left in the Dragun’s boss room will not be stolen.
- Killing Advanced Dragun will not make him drop his skull (His head explodes) making the player unable to get the Obsidian Shell Casing.
- When Advanced Dragun does his massive bullet hell pattern covering the entire screen in bullets, any form of blank effect (blank, armor shattering, Dark Marker, etc.) will clear the first half of his attack.
- Since the Dragun and the Advanced Dragun are technically different bosses, the Advanced Dragun can be Jammed while the Dragun is not, and vice-versa.
- This also means that killing the Advanced Dragun does not count towards Frifle and the Grey Mauser’s final hunt.
- Despite that, killing Advanced Dragun does count in regards to Dragun kill unlocks.
How to Unlock[]
The method to unlock the Paradox can only be accessed after killing at least one Past. In the Gungeon Proper, Black Powder Mine and the Hollow, there is a 20% chance that a cosmic rift will appear in a random room, which the player can walk into and interact with to receive a paradox effect. Killing the character’s past or the Lich with the effect active will unlock The Paradox.
Multiple cosmic rifts can appear in one run, and they can also appear during a Rainbow Run.
Saving and quitting the game will no longer remove the effect as it did previously. Dying and respawning with a Clone will also retain the effect.
Blanks[]
| Blank | |
|---|---|
| Statistics | |
| Type: | Active |
| Ammonomicon Entry | |
| Banish Bullets | |
| Erases all enemy projectiles in the room. Pushes enemies back, and deals a small amount of damage. |
Upon use, blanks clear the entire room of bullets, prevent bullets from spawning for a short time afterwards, deal 10 damage to enemies, and knock enemies away from players.
If blanks are used in rooms connected to secret rooms, the paths will open up.
If the player has less than 2 blanks, they are replenished to 2 upon entering the next chamber. The White Guon Stone, Chaos Ammolet, Uranium Ammolet, Copper Ammolet, Lodestone Ammolet, Gold Ammolet, and Frost Ammolet each increase the number of blanks replenished by 1, to a maximum of 11 blanks.
Blanks are carried over to the past, except for the past of the Pilot.
Accessing[]
- The Keep of the Lead Lord always contains a room containing a Fireplace, which can be extinguished with any non-oil Goop and then interacted with to reveal a room containing the hatch to the Oubliette.
- One (or two) water barrels
This water barrel can rarely spawn inside of the Oubliette entrance room, necessitating use of a goop to extinguish the fireplace.
can almost always be found randomly in a separate room on the same floor.
- One (or two) water barrels
- After extinguishing the fireplace and activating it, the chance for a water barrel to spawn within the same room as the Fireplace increases dramatically for the save file.
- The spawn chance for this water barrel appears to be independent from water barrel spawns outside of the fireplace room.
- After reaching the Oubliette once, the water barrel usually spawns in the fireplace room or a room adjacent to it.
- The hidden room contains a hatch with two locks. Unlocking both locks (which takes 2 keys) opens the trapdoor, and entering the trapdoor leads to the Oubliette.
- Entering the Oubliette for the first time unlocks Trashcannon and the Grate Hall achievement.
Hegemony Credits[]
| Hegemony Credit |
|---|
| Ammonomicon Entry |
| Accepted Galaxy-Wide |
| Standard currency throughout Hegemony of Man controlled systems.
Used by the Acquisitions Department to order new guns and items for storage in the Gungeon. |
Hegemony Credits are found upon:
- Defeating a boss.
- Clearing a boss without taking damage will double the amount of Hegemony Credits received. This can exceed the maximum amount of credits dropped as shown below.
- The amount is not doubled if flawlessly defeating a boss during a Rainbow Run. It is only slightly increased.
- Finishing a hunting quest.
- Rarely found upon clearing a room.
- Picking up the Briefcase of Cash.
- Finishing the tutorial for the first time.
Hegemony Credits are used to:
- Purchase items in The Breach that will show up in future runs.
- Fix shortcuts.
- Use the Boss Rush.
- Acquire the blessing of the Sorceress.
- Activate Challenge Mode.
- Unlock yellow skin.
- Play as The Paradox.
- Play as The Gunslinger.
A total of 1804 Hegemony Credits is required to purchase every gun and item from the shops in The Breach.
The player can’t obtain Hegemony Credits from bosses in a blessed run or a boss rush.
The amount of Hegemony Credits a boss drops is a random amount, based on its floor. The minimum and maximum values per floor are listed below:
| Min/Max | 1 | 2/Oub | 3/Abbey/4 |
|---|---|---|---|
| Min | 1 | 1 | 2 |
| Max | 3 | 4 | 5 |
Very early runs also have highly increased drop values above this maximum.
Hegemony Credits have their own Ammonomicon Entry, interestingly being the only item to not have an indicator of being Passive or Active.
Clutter[]
Clutter is a wide variety of minor objects found throughout the Gungeon, ranging from flowers to crates to skeletons. A few kinds of clutter can be found atop tables. Some clutter objects will stop a single bullet before being destroyed, while others do not obstruct gunfire. All clutter breaks instantly on contact with a Gundead creature or Gungeoneer. Clutter has a very tiny chance to spawn a Gun Fairy when broken. If the Pot Shots challenge is active, clutter objects have a chance to fire bullets at the player as they break.
Alone among clutter objects, stalagmites in the Black Powder Mine absorb multiple bullets before breaking, and block the movement of Gundead.
Trivia[]
- Nicknames that NPCs refer to the Bullet as include:
- Slug
- Ammo
- Round
- Shell
- Little guy
- Betrayer
- The Bullet’s past and alternate costume are references to The Legend of Zelda: A Link to the Past
The alternate costume is a reference to how Link turns into a rabbit if he goes into the Dark World without the Moon Pearl. The fact that a mirror is used to switch to this costume may also reference that Rabbit Link can only use one item in the Dark World, that being the Mirror.
.
- The Bullet’s past is the only past which has more than one boss.
- The Bullet cannot access the Hall of Knowledge because it is boarded off.
- When the Bullet dodge-rolls, the movement is similar to when a real bullet «tumbles».
- The Bullet is the only character story-wise that doesn’t have a need to kill their past. Since they already have the true Blasphemy at the start of the game, it can be inferred that they have originally killed Cannon in the past, unless it was awakened by some other means.
- The Bullet is immune to Blobulons, Spents, , and other contact damage-utilizing enemies due to Live Ammo.
- The Bullet deals 1 less damage with the Flame Hand than other characters, implying they have a lower intelligence modifier, and therefore lower intelligence.
- The Cultist will also get a wooden Blasphemy in The Bullet’s past.
- In the final scene, a Coaler is holding the Really Special Lute (a gun added in A Farewell To Arms), despite The Bullet’s past being added in Supply Drop.
- The Bullet appears as an alternate skin for the playable Bullet Kin in the 2D platform brawler game Indie Pogo.
- The Bullet’s alternate costume causes them to hop instead of their normal walk animation.
- The Bullet is the only character with more than one alternate skin.
- The Shotgun Kin alternate skin was present in the files since the Advanced Gungeons & Draguns Update but was only implemented when the physical edition was released.
- During character selection, selecting a character will cause their portrait to rotate, showing a bullet icon on the other side. The Bullet instead has a generic human silhouette on the other side of their portrait.
- If The Bullet’s past is completed with their Shotgun Kin Alternate Skin, they will unlock both their Alternate Rabbit Skin and their Alternate Weapon Skin.
- While in flight using items, such as Wax Wings or Jetpack, their cape changes shape to reflect this.
- Spinning your cursor around The Bullet quickly while moving will make The Bullet appear to be levitating, due to turning resetting the moving animation, which begins with The Bullet off the ground.
Rainbow Chests[]
Rainbow chests have a 0.0333% chance to replace a regular chest. Chests found upon clearing a room have a 0.001% chance to become a rainbow chest in addition to the normal 0.0333% chance, effectively a 0.0343% chance. Rainbow chests also have a chance to disguise themselves as brown chests, only revealing themselves once opened, broken, or shot with a weapon that leaves water/goop.
Rainbow chests are never locked. However, they can be locked when they appear as a brown chest.
Rainbow chests contain 8 items and/or guns, which consist of approximately 15% , 54% and 31% . They can also transform into synergy chests upon being opened, containing 8 items and/or guns that synergize with items/weapons currently held, similar to an actual synergy chest.
Rainbow Run
Trivia[]
- Nicknames that NPCs refer to the Robot as include:
- Machine
- Automaton
- Android
- Mechano-man
- Can-opener
- Robert
- Number 4
- Colonel Klink
- Toaster
- Metal Head
- Prior to patch 1.0.7, The Robot didn’t get any armor from picking up Master Rounds
Prior to the Advanced Gungeons & Draguns Update, The Robot did not get from items that grant heart containers.
.
- The nickname «Colonel Klink» is possibly a reference to the old American television show, Hogan’s Heroes, where Colonel Klink fits in the role of an oblivious colonel at a WWII camp.
- The nickname «Number 4» is possibly a reference to the movie Short Circuit, where the main character is named Number 5.
- The Robot’s starting gun is called «Robot’s Right Hand»; however, the art for the boss versus screen shows it readying its left hand, and not its right. This could be because of an inconsistency created by mirroring the art or, while unlikely, an implication that The Robot has swapped hands as to keep firing with its dominant hand.
- The Robot’s past and alternate costume are references to the Terminator franchise.
- The minions summoned by the Last Human resemble the T-800 Terminators.
- The beginning of The Robot’s past where he boots up is the same as the T-800 Terminator boot-up, with the red screen and systems activating.
- EMP-R0R’s appearance is a reference to Hal 9000.
- The arena’s walls are filled with references to various franchises and games including (but not limited to):
- A drawing of Mettaton from the game Undertale.
- «Bots don’t shiv» is a reference to the phrase «I don’t shiv» from Batman: The Dark Knight Returns.
- A drawing of a Reaper from the game Mass Effect
- A drawing that refers to a jailbot of Superjail!.
- A drawing of the «Robotology» religion symbol from .
- A drawing of a Cylon from the Battlestar Galactica franchise.
- A pair of drawings of Tom Servo and Crow T. Robot from Mystery Science Theater 3000.
- A pair of drawings of Atlas and P-Body from the game Portal 2.
- A drawing of an E Tank from the Megaman franchise.
- Eight empty squares surrounding a «W» in the center, referencing the stage select screens from the Megaman franchise.
- The robot sitting beside EMP-R0R resembles a sentinel from the Matrix franchise.
- The minions of the Last Human turn into critters upon death. This is a reference to the Sonic franchise.
- The other robots talk to each other using the word ‘ye’. This is a reference to .
- Next to EMP-R0R stands a device resembling a hookah except with a plug, a reference to the act of «jacking off» from Futurama.
- EMP-R0R’s pose and Roman styling may be a reference to Hedonismbot from Futurama.
- According to the Ammonomicon entry for Robot’s Left Hand, the Robot, as well as most other robots, is left-handed.
- The Robot’s face is made of keyboard symbols.
- This character may be inspired by «??? (Blue Baby)» From The Binding of Isaac.
List of Unlockables in Exit the Gungeon[]
This List is not complete yet.
| Unlock Condition | Unlock | ||||||||||||
|---|---|---|---|---|---|---|---|---|---|---|---|---|---|
| Interact with the disc hidden at the very top of the tutorial. |
|
||||||||||||
| Successfully Exit The Gungeon as any character. |
|
||||||||||||
| Successfully Exit The Gungeon as the 4 main Gungeoneers. |
|
||||||||||||
| Successfully Exit The Gungeon as the 4 main Gungeoneers and The Bullet. |
|
||||||||||||
| Defeat the Buffammo five times. |
|
||||||||||||
| Defeat His Majesty’s Chancellor five times. |
|
||||||||||||
| Defeat the Meowitzer five times. | |||||||||||||
| Defeat Medusalier five times. |
|
||||||||||||
| Defeat the Eyebalrog five times. |
|
||||||||||||
| Defeat Gungamesh five times. | |||||||||||||
| Defeat the Low Priest five times. | |||||||||||||
| Defeat the Bolt Python five times. | |||||||||||||
| Defeat Mutread Head five times. | |||||||||||||
| Defeat the Killinder five times. | |||||||||||||
| Defeat the Sepulchergeist five times. |
|
||||||||||||
| Defeat the Fallmonger five times. | |||||||||||||
| Defeat The Last Dragun five times. | |||||||||||||
| Defeat any Forge Boss Without Taking Damage. |
|
||||||||||||
| Defeat any Hollow Boss Without Taking Damage. |
|
||||||||||||
| Defeat any Black Powder Mine Boss Without Taking Damage. |
|
||||||||||||
| Defeat any Gungeon Proper Boss Without Taking Damage. |
|
||||||||||||
| Defeat The Last Dragun Without Taking Damage. |
|
||||||||||||
| Buy 50 items from Bello. | |||||||||||||
| Buy 20 items from Cadence And Ox. | |||||||||||||
| Exit The Gungeon As The Pilot. |
|
||||||||||||
| Exit The Gungeon As The Convict. |
|
||||||||||||
| Exit The Gungeon As The Marine. |
|
||||||||||||
| Exit The Gungeon As The Hunter. |
|
||||||||||||
| Exit The Gungeon As The Bullet. |
|
||||||||||||
| Exit The Gungeon As The Cultist. |
|
||||||||||||
| Exit The Gungeon As The Robot. |
|
||||||||||||
| Reach a Combo of 10. |
|
||||||||||||
| Reach a Combo of 20. |
|
||||||||||||
| Lose a Combo of 15 or higher. |
|
||||||||||||
| Pet the Dog |
|
||||||||||||
| Deliver the Unstealable Stool to Bello. |
|
||||||||||||
| Deliver the Cane to Old Red. |
|
||||||||||||
| Deliver the Glue to Flynt. |
|
||||||||||||
| Deliver the Salt to Professor Goopton. |
|
||||||||||||
| Deliver the Gungear to the Old Man. |
|
||||||||||||
| Deliver Gunnut Butter and the Pretzel to Daisuke. |
|
||||||||||||
| Carry Eight Weapons At Once in Arsenal Mode. (The ever-changing blessed gun counts for one weapon). |
|
||||||||||||
| Exit The Gungeon in Arsenal Mode. |
|
||||||||||||
| Exit The Gungeon at least twice as two different Gungeoneers. |
|
||||||||||||
| Defeat the Glocktopus. |
|
||||||||||||
| Purchase from Ox and Cadence with . |
|
||||||||||||
| Purchase from Doug with . |
|
Notes[]
- If Blasphemy is acquired as Robot, it will not fire projectiles as The Robot is technically never at full health.
- The Robot deals 1 more damage with the Flame Hand than other characters, implying he has a higher intelligence modifier and therefore, higher intelligence.
- Due to all non-rainbow chests being impossible to open in Rainbow Mode, it makes sense to destroy them instead. Besides the occasional pickup, this ends up giving you a lot of Junk. Consequently, the Robot excels in completing rainbow mode, as the 5% damage boosts will build up over the entirety of your junking spree. Its relatively strong starter weapon also means the player can pick an item instead of a weapon on the first floor.
- The Robot can’t sell its health to the Vampire. As it technically has zero hearts, the Vampire will refuse to trade and say the Robot hungers as much as she does, a quote she tells other Gungeoneers at low health.
- Patches and Mendy are unable to heal the Robot, and to compensate will give it a Bottle, Armor, or Junk, for free.
- Using a Peace Shrine as the Robot consumes the active gun with no benefit.
- As of A Farewell to Arms update, the Robot can use shrines that consume a heart container by losing two Armor.
- Some effects from the Dice Shrine which affect health, like Bolstered, don’t affect The Robot.
- The Robot cannot access the Hall of Knowledge because it is boarded off.
- Unlike the other Gungeoneers, the robot falls into the Gungeon rather than descending down the staircase. If wearing its alternate costume, however, it enters normally.
- Spice won’t take any armor from The Robot, only giving curse and lower accuracy, making it a very powerful item.
Notes[]
- — If the player also has Teapot, while reloading the Teapot, a small red aura will appear around Junkan. Every enemy in this aura will be ignited.
- Holding Ser Junkan multiplies the of Junk by 1.5, and the chest destruction loot weight of Gold Junk by 3, making them both more likely to appear over other payouts.
- If the player defeats the Lich when Ser Junkan is at his final level, the normal win screen image will be overridden with an image of Ser Junkan, with the player in the background giving a thumbs up.
- This won’t occur if you choose to kill your past during the run, as you lose all your items.
- This could be implying that Ser Junkan reached a point where he is now considered the protagonist instead of the player.
- Lies also works to upgrade Ser Junkan’s level.
- In co-op, if a player has Ser Junkan at Holy Knight, the player will not be revived if they are not the last player alive. Dying with Ser Junkan while another player is alive will just kill the player normally, and Ser Junkan will be lost.
- The blanks from Ser Junkan’s Holy Knight form are affected by items (for example, Gold Ammolet).
- The Ammonomicon lists this item as «Junk», instead of Ser Junkan.
- Ser Junkan will revert forms whenever Junk is lost, such as by dropping it or using it to complete the Hollow shortcut.
- Unlike regular Junk, Ser Junkan does not synergize with Trashcannon. However, he does have an with Trashcannon.
- When upgraded to Angelic Knight, Ser Junkan’s bullets are affected by bullet upgrades.
- When upgraded to Angelic Knight, Ser Junkan’s bullets are affected by Flak Bullets which may cause lag.
- Ser Junkan is one of the few items that can be dropped by breaking any chest in Rainbow Mode, unless already unlocked.
- Battle Standard can be unlocked by upgrading Ser Junkan to Angelic Knight.
Keys[]
Keys are used to open locked chests and doors, as well as the trapdoor to the Oubliette and the trapdoor to the passageway to the Resourceful Rat’s Lair.
Every Shop apart from the Forge’s shop will always have at least one key for sale.
Flynt uses keys instead of coins in exchange for his items.
Cell Keys
Cell keys are used to open cells to free NPCs. On any floor with a cell, a cell key will drop from a random enemy on the floor (including the boss). They cannot be used as regular keys. Cell keys are automatically collected by the player if they attempt to leave them behind.
Rat Keys
Rat keys are used to open and certain doors. They are obtained from the third phase of the Resourceful Rat fight. They cannot be used as regular keys. Rat Keys are automatically collected by the player if they attempt to leave them behind.
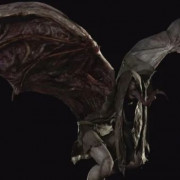
Advanced Dragun[]
In the Advanced Gungeons & Draguns Update, the player can access a third, more difficult phase of the Dragun.
Access
In the Resourceful Rat’s Lair, the loot room after fighting the rat is connected to a secret room. In the secret room, there are two locked doors which must be opened with special Rat keys. Rat keys drop only during the third Punch Out phase of the rat fight. You can earn up to six keys each time you face the rat. Behind the doors is a small serpent. It’s possible to drop items through the second door so just one key is needed to free the serpent.
Once hatched, the player needs to feed it four items or guns by dropping them in front of the baby serpent to awaken it.
- Junk and Glass Guon Stones are good for this purpose.
- The serpent will not eat the Busted Television, Sponge or Trusty Lockpicks.
- If the Resourceful Rat has died, his corpse can be fed to the serpent.
- If you drop the 4th item and take it back right after, the serpent might awake with the item still in your inventory, soft-locking the game when reloading.
- The serpent can also be hatched by dropping the Weird Egg into fire, which can be bought in shops or found in chests.
Once the serpent has been awakened, it will follow the player and block enemy bullets. If you reach the Dragun, the serpent will abandon you and join with the Dragun to form the Advanced Dragun. Beat it to unlock the Advanced Slayer achievement. It is possible to spawn multiple serpents. The Dragun fight will progress the same as with a single serpent.
Behavior
The first phase proceeds as normal, except the serpent will fly around near the Dragun and occasionally fire a burst of bullets at the player. After entering the second phase, once the first wave of bullets ends, the Dragun will grab the serpent, absorb it, and then begin the third phase, with a new look as his body becomes covered in gold and his forehead glows green. In this phase, he has many new, more difficult attacks:
- Breathes a dense stream of fiery bullets towards the player, either sweeping the room or aiming at the player. The fiery bullets stick to the back of the arena.
- Pulls out two pistols and fires tight bursts of bullets towards the player.
- Pulls out two grenade launchers and fires a barrage of grenades across the arena.
- Pulls out two Uzis and fires two streams of bullets which form a stationary arc sweeping the arena. The stationary bullets then send out three waves of erratic bullets in all directions.
- Roars, sending down three fireballs. This creates three zones that prevent the player from shooting.
- Projects a large eye on the ground that follows the player and dims the room. While the player is in the eye, the Dragun sends out triangular bullets.
- Fires five skulls which stop mid-travel and fire bullets at the player.
- Fires a rocket, which sends out a large ring of bullets upon colliding with the wall, along with many bullets that travel in a wave pattern across the room.
- Throws large knives into both walls, which fire spreads of 3 fast-moving kunai at the player.
- Fills the room with moving bullets, similar to the Phase 2 attack. The player must dodge between circular safe zones, which some now also have bullets in their centers.
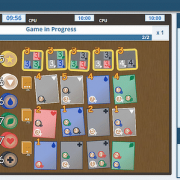
Rat Chests[]
Rat chests are special chests in the Resourceful Rat’s Lair that can only be opened using keys dropped by the Resourceful Rat during the Punch-Out phase of his fight. Four rat chests always appear in the loot room after the fight, containing Elimentaler, Partially-Eaten Cheese, Resourceful Sack, and Rat Boots in a random order. Collecting all four items transforms the player character into the Resourceful Rat (changes the skin of the character while the 4 items are held).
It is possible for rat chests to be mimics, though not by holding the Mimic Tooth Necklace, which has no effect, other than bringing out a local mimic union member NPC to warn you that there are simply too many chests in the room and they couldn’t agree to that deal.
Rat Chests cannot be opened with AKEY-47 or Shelleton Key, but they can be opened with Trusty Lockpicks and Drill.
If the Resourceful Rat is killed with one player dead in co-op, all the chests can be opened without the use of a key. This does not revive the other player.