Final fantasy 14: уровневый список классов исцеления
Содержание:
- Level 21 — 30
- Ultimate raids[]
- Level 71 — 80
- Bosses
- №3 — Ученый
- №1 — Астролог
- Behind the scenes[]
- Gallery[]
- Warrior
- Naming conventions[]
- Class Job and Role Quests
- Behind the scenes[]
- Equipment[]
- Resistance Weapons (iLvl 485)
- Вакансии Heavensward
- Characteristics[]
- Recollection Weapons (iLvl 500)
- Официальные и неофициальные ограничения пробной версии Final Fantasy 14
Level 21 — 30
| Item | Icon | Level | Item Level | Damage | Delay | Auto Attack | Materia Slots | Stats and Attributes |
|---|---|---|---|---|---|---|---|---|
| Elm Velocity Bow | 21 | 21 | 14 | 2.80 | 13.06 | 2 | Dexterity +4, Vitality +3, Critical Hit +4 | |
| Flame Private’s Shortbow | 22 | 23 | 16 | 2.80 | 14.93 | Dexterity +4, Vitality +5, Direct Hit Rate +5 | ||
| Serpent Private’s Shortbow | 22 | 23 | 16 | 2.80 | 14.93 | Dexterity +4, Vitality +5, Direct Hit Rate +5 | ||
| Storm Private’s Shortbow | 22 | 23 | 16 | 2.80 | 14.93 | Dexterity +4, Vitality +5, Direct Hit Rate +5 | ||
| Aetherial Wrapped Elm Longbow | 24 | 24 | 16 | 3.36 | 17.92 | Dexterity +5, Vitality +5 | ||
| Wrapped Elm Longbow | 24 | 24 | 14 | 3.36 | 15.68 | 2 | Dexterity +4, Vitality +4, Critical Hit +4 | |
| Bow of Owls | 24 | 26 | 17 | 2.80 | 15.86 | Dexterity +5, Vitality +5, Determination +4, Skill Speed +5 | ||
| Aetherial Ash Composite Bow | 28 | 28 | 18 | 3.20 | 19.20 | Dexterity +6, Vitality +6 | ||
| Ash Composite Bow | 28 | 28 | 16 | 3.20 | 17.06 | 2 | Dexterity +5, Vitality +5, Determination +4 | |
| Joukil’s Guile | 28 | 30 | 19 | 3.20 | 20.26 | Dexterity +6, Vitality +7, Critical Hit +8, Determination +4 | ||
| Bow of the White Wisp | 30 | 30 | 19 | 3.04 | 19.25 | Dexterity +6, Vitality +7 | ||
| Flame Private’s Bow | 30 | 31 | 20 | 2.64 | 17.60 | Dexterity +7, Vitality +7, Direct Hit Rate +9 | ||
| Serpent Private’s Bow | 30 | 31 | 20 | 2.64 | 17.60 | Dexterity +7, Vitality +7, Direct Hit Rate +9 | ||
| Storm Private’s Bow | 30 | 31 | 20 | 2.64 | 17.60 | Dexterity +7, Vitality +7, Direct Hit Rate +9 |
Ultimate raids[]
Ultimate raids are a type of 8-player raid introduced in Stormblood. They are high-end raids that host a gauntlet of bosses from previous duties that must be defeated in a single attempt. Failing will reset the entire gauntlet. They are intended to be of even higher difficulty levels then the Extreme or Savage levels that previously represented the game’s hardest content. These raids require players to have completed the Savage difficulty-level of the previous raid section to even unlock. Due to their high difficulty, Ultimate raids are not intended to be «progression» content for the majority of the player base, and are designed solely for those seeking a challenge.
Ultimate raids have thus far been strictly recreations of older content, with the Unending Coil of Bahamut being based on the Binding Coil of Bahamut raid series, The Weapon’s Refrain being based on the climactic battles of the A Realm Reborn main storyline, and The Epic of Alexander being based on the Alexander raid series.
The next Ultimate raid, tentatively called the Dragonsong War (Ultimate), is planned to be released in patch 6.1, and will be based on the climatic battles of the Heavensward main storyline.
List of Ultimate raids
| Name | Level | Max Item Level | Final Boss | Unlock | Tomestones | Release | |
|---|---|---|---|---|---|---|---|
| The Unending Coil of Bahamut (Ultimate) | 70 | 345 | Bahamut Prime | Complete Deltascape (Savage) | 100 | 4.11 | |
| The Weapon’s Refrain (Ultimate) | 70 | 375 | The Ultima Weapon | Complete Sigmascape (Savage) | 100 | 4.31 | |
| The Epic of Alexander (Ultimate) | 80 | 475 | Perfect Alexander | Complete Eden’s Gate (Savage) | 30 | 5.11 |
Level 71 — 80
| Item | Icon | Level | Item Level | Damage | Delay | Auto Attack | Materia Slots | Stats and Attributes |
|---|---|---|---|---|---|---|---|---|
| Lakeland Lance | 71 | 390 | 107 | 2.80 | 99.86 | 2 | Strength +381, Vitality +426, Determination +337, Skill Speed +236 | |
| Applewood Spear | 72 | 395 | 96 | 2.80 | 89.60 | 2 | Strength +351, Vitality +395, Critical Hit +216, Determination +309 | |
| Fae Spear | 73 | 400 | 108 | 2.80 | 100.80 | 2 | Strength +399, Vitality +451, Determination +245, Skill Speed +350 | |
| Bluespirit Spear | 74 | 403 | 97 | 2.80 | 90.53 | 2 | Strength +362, Vitality +408, Determination +318, Direct Hit Rate +223 | |
| Ravel Keeper’s Spear | 75 | 406 | 110 | 2.80 | 102.66 | 2 | Strength +405, Vitality +455, Critical Hit +360, Skill Speed +252 | |
| Sandteak Fauchard | 76 | 409 | 99 | 2.80 | 92.40 | 2 | Strength +368, Vitality +410, Critical Hit +333, Determination +233 | |
| Nabaath Spear | 77 | 412 | 111 | 2.80 | 103.60 | 2 | Strength +413, Vitality +456, Critical Hit +266, Direct Hit Rate +379 | |
| Dwarven Lignum Lance | 78 | 415 | 100 | 2.80 | 93.33 | 2 | Strength +375, Vitality +411, Determination +245, Direct Hit Rate +350 | |
| Trident of the Forgiven | 79 | 418 | 112 | 2.80 | 104.53 | 2 | Strength +421, Vitality +457, Critical Hit +399, Direct Hit Rate +280 | |
| Dreizack Replica | 80 | 1 | 6 | 2.80 | 5.60 | |||
| Replica Dreizack Recollection | 80 | 1 | 6 | 2.80 | 5.60 | |||
| Replica Law’s Order Spear | 80 | 1 | 6 | 2.80 | 5.60 | |||
| Augmented Menis | 80 | 430 | 103 | 2.80 | 96.13 | 2 | Strength +393, Vitality +413, Critical Hit +260, Direct Hit Rate +372 | |
| Weathered Trishula | 80 | 430 | 114 | 2.80 | 106.40 | 2 | Strength +437, Vitality +459, Critical Hit +413, Determination +289 | |
| Ronkan Partisan | 80 | 440 | 115 | 2.80 | 107.33 | 2 | Strength +451, Vitality +462, Determination +294, Direct Hit Rate +420 | |
| Skystrider | 80 | 450 | 105 | 2.80 | 98.00 | 2 | Strength +428, Vitality +445, Determination +391, Direct Hit Rate +273 | |
| The King’s Spear | 80 | 450 | 117 | 2.80 | 109.20 | 2 | Strength +476, Vitality +494, Critical Hit +304, Direct Hit Rate +434 | |
| Augmented Skystrider | 80 | 460 | 107 | 2.80 | 99.86 | 2 | Strength +452, Vitality +476, Determination +403, Direct Hit Rate +282 | |
| Deepshadow Lance | 80 | 460 | 119 | 2.80 | 111.06 | 2 | Strength +502, Vitality +529, Critical Hit +448, Determination +314 | |
| Menis | 80 | 465 | 120 | 2.80 | 112.00 | 2 | Strength +516, Vitality +548, Critical Hit +319, Direct Hit Rate +455 | |
| Augmented Deepshadow Lance | 80 | 470 | 121 | 2.80 | 112.93 | 2 | Strength +530, Vitality +566, Critical Hit +462, Determination +323 | |
| Edengrace Spear | 80 | 475 | 122 | 2.80 | 113.86 | 2 | Strength +544, Vitality +585, Critical Hit +327, Direct Hit Rate +467 | |
| Ultimate Rhongomiant | 80 | 475 | 122 | 2.80 | 113.86 | 3 | Strength +544, Vitality +585, Critical Hit +327, Direct Hit Rate +467 | |
| Neo-Ishgardian Trident | 80 | 480 | 111 | 2.80 | 103.60 | 2 | Strength +502, Vitality +543, Critical Hit +425, Direct Hit Rate +297 | |
| Dreizack | 80 | 485 | 124 | 2.80 | 115.73 | 5 | Strength +573, Vitality +623, Critical Hit +477, Determination +334 | |
| Ruby Partisan | 80 | 485 | 124 | 2.80 | 115.73 | 2 | Strength +573, Vitality +623, Critical Hit +334, Direct Hit Rate +477 | |
| Augmented Neo-Ishgardian Trident | 80 | 490 | 112 | 2.80 | 104.53 | 2 | Strength +528, Vitality +579, Critical Hit +434, Direct Hit Rate +303 | |
| Crystarium Spear | 80 | 490 | 125 | 2.80 | 116.66 | 2 | Strength +587, Vitality +643, Determination +337, Direct Hit Rate +482 | |
| Spear of Light | 80 | 495 | 126 | 2.80 | 117.60 | 2 | Strength +602, Vitality +664, Critical Hit +487, Determination +341 | |
| Augmented Crystarium Spear | 80 | 500 | 127 | 2.80 | 118.53 | 2 | Strength +617, Vitality +685, Determination +344, Direct Hit Rate +492 | |
| Augmented Dreizack | 80 | 500 | 127 | 2.80 | 118.53 | 5 | Strength +617, Vitality +685, Critical Hit +492, Determination +344 | |
| Dreizack Recollection | 80 | 500 | 127 | 2.80 | 118.53 | 5 | Strength +617, Vitality +685, Critical Hit +492, Determination +344 | |
| Edenchoir Fork | 80 | 505 | 128 | 2.80 | 119.46 | 2 | Strength +634, Vitality +707, Critical Hit +498, Direct Hit Rate +349 | |
| Exarchic Spear | 80 | 510 | 116 | 2.80 | 108.26 | 2 | Strength +586, Vitality +657, Determination +318, Direct Hit Rate +454 | |
| Law’s Order Spear | 80 | 510 | 129 | 2.80 | 120.40 | 5 | Strength +651, Vitality +730, Critical Hit +353, Determination +504 | |
| Augmented Law’s Order Spear | 80 | 515 | 130 | 2.80 | 121.33 | Strength +668, Vitality +754 | ||
| Emerald Partisan | 80 | 515 | 130 | 2.80 | 121.33 | 2 | Strength +668, Vitality +754, Critical Hit +510, Direct Hit Rate +357 | |
| Augmented Exarchic Spear | 80 | 520 | 118 | 2.80 | 110.13 | 2 | Strength +617, Vitality +700, Determination +325, Direct Hit Rate +464 | |
| Cryptlurker’s Spear | 80 | 520 | 131 | 2.80 | 122.26 | 2 | Strength +686, Vitality +778, Determination +361, Direct Hit Rate +515 | |
| Diamond Zeta Partisan | 80 | 525 | 132 | 2.80 | 123.20 | 2 | Strength +704, Vitality +804, Critical Hit +365, Determination +521 | |
| Augmented Cryptlurker’s Spear | 80 | 530 | 133 | 2.80 | 124.13 | 2 | Strength +723, Vitality +830, Determination +368, Direct Hit Rate +526 | |
| Edenmorn Halberd | 80 | 535 | 134 | 2.80 | 125.06 | 2 | Strength +725, Vitality +836, Critical Hit +531, Direct Hit Rate +372 | |
| Replica Augmented Law’s Order Spear | 80 | 1 | 6 | 2.80 | 5.60 |
Bosses
https://youtube.com/watch?v=O7dI5Udv0t0%3F
The Antitower Guide
Zuro Roggo
The first boss in the dungeon.
Spawns Adds (Choirtoad) throughout the fight. Inflicts debuff toad on two players that can’t be dispelled and spawns two adds, these must be killed to dispell the debuff (Seems to hit the Healer and one DPS). Spawns two bubbles that inflict moderate damage and the debuff Damage Down.
Be sure to kill the adds quickly if your Healer is inflicted with Toad
Abilities
- Toy Hammer has a cast time on the Tank, causes a DOT (Concussion) that can be dispelled
- Water Bomb circular AoE that inflicts moderate damage
Ziggy
The second boss, a spriggan.
Spawns three stones called Stardust with expanding AoE that need to be killed before the platform is covered. They become solid after the AoE. Emotes «Ziggy takes careful aim» and tethers to one player, can be avoided by hiding behind a stone.
Spawns adds, Spriggan Gemcutter, that need to be killed.
Abilities
- Jittering Glare Frontal Cone aoe
- Gyrating Glare Platform-wide AoE for high damage, can be dodged by hiding behind the stones
Calcabrina
A giant doll that starts out as 6 smaller dolls, 3 Calca and 3 Brina, that do various AoE patterns. Merges after the small ones are dead to Calcabrina.
- Be sure to kill Calca and Brina quickly, as it can hit your Healer and your party will take medium damage throughout the dollhouse phase.
- Look away from her if you or another player has a red eye above their head.
Abilities
- Dollhouse Transforms two players into dolls (Calca and Brina) that cause a dot on these player and the dolls need to be killed to free the player and end this phase
- Slapstick A channeled AoE that she casts while Dollhouse is active
- Knockout Has a medium cast time and inflicts massive damage on the tank (or other players if the tank is dead)
- Brace Parry attacks from a certain direction
- Terrifying glance Targets a player with a red eye above their head and blasts everything in their direction with a frontal cone. Causes confusion if hit. This attack can be avoided by looking away from the boss.
№3 — Ученый
Сзади идет фея-целитель FF14, Ученый. Класс, конечно, неплохой, просто они могут не так легко засветиться, как раньше. Хотя это и хорошо! В предыдущих патчах Scholar чувствовал себя незаменимым помощником для большинства вечеринок и оставлял другие в пыли. Вероятно, он мог бы выдержать немного любви, но сейчас он находится в гораздо более справедливом положении, чем в последние несколько лет.
Ученый — один из двух классов исцеления, запущенных с FF14. Они в значительной степени полагаются на своих фей, Эос или Селен, в зависимости от ваших предпочтений, чтобы использовать регенерацию и обеспечить дополнительные баффы для исцеляющей магической силы. Класс также ориентирован на щит, поэтому в их распоряжении не так много вариантов регенерации, и вместо этого они применяют способности до того, как уйдет урон босса, чтобы убедиться, что группа защищена.
В распоряжении ученого также множество мгновенных заклинаний, и хотя все три класса действительно обладают мгновенными способностями, другой трюк ученого, прежде чем другие, всегда больше полагался на мгновенное применение (OGCD ) исцеление, чем другие. Смягчение повреждений с помощью щитов и правильное управление своей феей на поле дает Ученому дополнительный уровень сложности, как у Астролога, но все же не так сложно. Они также вносят бафф урона в бои в виде Chain Strategem, что делает их немного более командными и менее ориентированными на индивидуальный DPS.
Если вы не уверены, что попробуете что-то столь же усердное, как Astrologian, но чувствуете, что вам может потребоваться небольшой шаг вперед от White Mage, Scholar — отличное место для начала. Их Феей не так сложно управлять, как в предыдущих патчах, но не отставать от Эос на поле боя и следить за тем, чтобы она исцеляла нужных людей. Возможно, они не на высоте, но они по-прежнему отличный выбор и преуспевают во всем контенте.
№1 — Астролог
Если вы заинтересованы в освоении бесспорных лучших во время Shadowbringers, то перейдите на Астролог — наш номер один в этом списке. После неудачного запуска в начале Heavensward Square Enix сгладила проблемы с помощью последнего добавленного класса исцеления, и с тех пор они безраздельно властвовали.
Астрологов так любят в основном потому, что этот класс ни в малейшей степени не жаден, поскольку они несут в себе полезность для всего рейда, которая дает вашей группе большие баффы урона в виде карт. Эти карты, если их применить правильно, могут привести к победе над грозными боссами на соревновательной скорости в FF14. Весь их набор основан на идеальном жонглировании этими картами, исцелении своих союзников и нанесении индивидуального DPS. Это также оставляет их в самом тяжелом положении из трех, и часто считается, что они требуют высочайшего мастерства для игры.
Они хорошо взаимодействуют с любой группой, но астрологи также обладают уникальной способностью переключаться между двумя разными позициями — дневной сектой и ночной сектой. Эти стойки дают им возможность использовать регенерацию или щиты с помощью своих навыков, что делает их больше похожими на Белого мага или ученого, в зависимости от вашей секты. Вы можете переключаться между этими стойками в зависимости от того, какую роль играет ваш сподвижник, делая астрологов готовыми выполнить любые потребности их группы. Однако не стоит слишком привыкать к этому стилю игры. В Endwalker астрологи станут чистым лечебным классом и потеряют свои способности щита, что сделает их более гармоничными с Белым Магом.
Рекомендуем ознакомится с другими гайдами на популярные игры tattoo-mall.ru. Расскажем про секреты и хитрости, которые можно использовать в играх со своей выгодой. А также про полезные и интересные историй в видеоиграх.
Если вы готовы принять вызов и чувствуете, что можете участвовать в дополнительном микроменеджменте, который требует Астролог, выберите целителя, использующего земной шар. Даже если бы они были бесполезны, это изящное оружие все равно принесло бы им первое место.
Behind the scenes[]
Warrior’s skillset, choice of weaponry, and artifact armors reflect Berserker than rather than the archetypal Fighter or Warrior that appears throughout the series, or even Final Fantasy XI‘s Warrior job. This is alluded to in Shadowbringers with the appearance of a Berserker in Heroes’ Gauntlet, who functions nearly identically to a Warrior with the only real difference being in the use of a greatsword instead of an axe.
The Warrior soul crystal resembles the Taurus Zodiac Stone from Final Fantasy Tactics.
Square Enix’s Eorzea Cafe served a dish called «Roast beef of monsters ~hunted by Marauder~» whose description translates to: Wild beasts hunted by the rock-shattering Marauder done roast beef style. Lather up your opponents in bloodbath sauce and smite them down!
Gallery[]
Marauders.
Marauder render for the original Final Fantasy XIV.
Warrior render for the original Final Fantasy XIV.
Marauder render for Final Fantasy XIV: A Realm Reborn.
Warrior Soul Crystal.
The Adventurer stand in as a Warrior in The End of an Era.
A Hyur Warrior in A Realm Reborn.
A Hyur Warrior without his helmet.
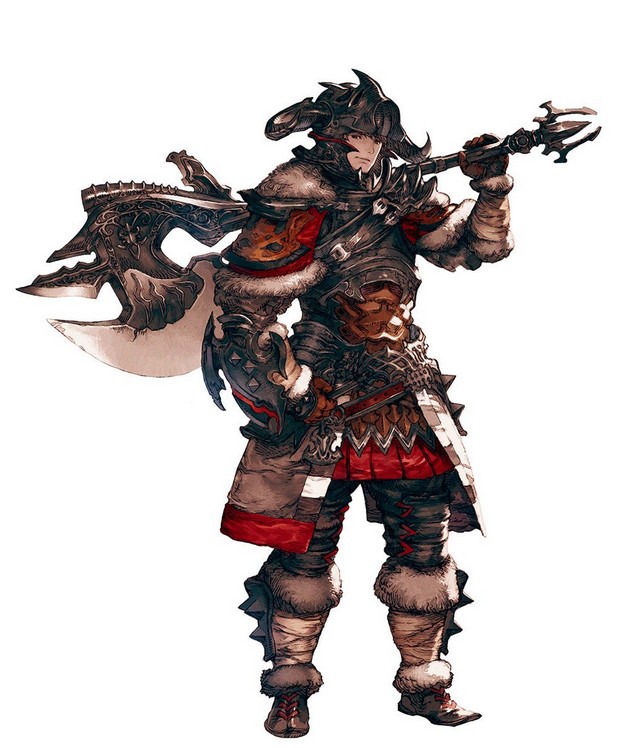
Warrior promotional artwork.
Warrior artwork by Akihiko Yoshida.
Warrior on the cover of Dengeki PlayStation magazine.
A Marauder as seen in the 25th Anniversary Poster of Final Fantasy.
Warrior sprite.
Warrior’s victory pose.
- Arms and Gear sets
An axe.
Another axe.
Weapons.
Warrior Relic Equipment concept art.
Bearsmaw PVP set.
Artifact equipment from Stormblood.
Artifact equipment from Shadowbringers.
- Abilities
Heavy Swing.
Maim.
Overpower.
Defiance.
Storm’s Path.
Mythril Tempest.
Storm’s Eye.
Infuriate.
Fell Cleave.
Decimate.
Onslaught.
Upheaval.
Inner Release.
Chaotic Cyclone.
Nascent Flash.
Inner Chaos.
- Removed Actions
Foresight.
Skull Sunder.
Fracture.
Bloodbath.
Brutal Swing.
Deliverance.
Warrior
If it’s one thing a Warrior likes to do, it’s bashing things in the head.
If you want to rush into battle feeling like a Viking of war, the Warrior class is the class to be! These guys are damage dealers made for tanking! Probably forged from iron and fire or something else as equally badass, they’re savage and beastly while lugging around weapons at least as heavy as a Miqo’te.
- ALL OF THE HEALTH. Warriors have the highest HP out of any other class or job in the game. So, you know, when everyone else takes damage, you’re not affected on the same level.
- Cross class access is a thing with this guy. Specifically, from the Gladiator and Pugilist classes. Which is great because punching stuff with Haymaker makes you feel good.
- You get to swing around a giant axe. Being a warrior is all about showing off your strength. What better way is there to do just that than by lugging around impossibly large battle axes or claymore-like swords?
- Inner Release allows you to use Beast gauge actions with no cost and nullifies effects such as Stun, Sleep, Bind, Heavy as well as most knockback and draw-in effects. Warriors just REFUSE to go down!
- You get to wear armor that looks beastly. Mostly because, you know, that’s the whole theme there. Still, it looks really flipping cool.
Naming conventions[]
Forenames
The Rava and Veena clans share many traditions, naming practices among them. Thus, a Viera’s forename is not indicative of the clan to which she belongs─rather, it is the lifestyle she leads that determines whether she bears a «forest» or «city» forename. Traditional Viera forenames given at birth are also referred to as «forest names,» as they are used by those Viera still residing in their homeland─which is the Golmore Jungle, in the case of the Rava, or the forest skirting the Skatay Range for the Veena. Forest names resemble real-world Icelandic names and are pronounced similarly─in the names «Theja», and «Nojra», for instance, the «j» sounds more like an English «i».
In practice, however, one will rarely encounter a Viera using her forest name, as those who choose to strike out into the wider world will generally choose new «city names» to mark their parting from the traditional Viera way of life. These chosen names are often inspired by the names of other races they encounter, or simply things that they like, such as «Cherry» or «Morning Glory», and so vary widely between individuals. Incidentally, «Fran» is one such name.
Forest names include:
- Ruuj, Shara, Rena, Rael, Bjonse, Arjm, Coeli, Ysera, Yurhee, Venase, Ukina, Sonja, Slejsa, Qestra, Petra.
Surnames
In the Viera’s forest homeland, surnames are taken from the name of the village of one’s birth. The most common surnames are the names of the largest Viera villages. As with forenames, surnames are generally discarded or replaced once one chooses to venture into the wider world.
Common Rava surnames include:
- Hyskaris, Eruyt, Camoa, Muscadet, Atoel, Bysnoe, Dei-Ijla, Fyth, Golmarr, Iryut.
Common Veena surnames include:
- Roda, Lesrekta, Arda, Ymir, Bosco, Gucuma, Kisne, Tehp, Paharo, Muruc.
Class Job and Role Quests
Class quests and job quests are given by your class guild master and other leaders of your chosen profession. They can be completed to earn new skills and abilities, along with gear and other items. These quests are available every few levels and it is recommended to complete them as soon as they become available.
- Class Quests – These quests cover the story up to level 30 for each combat class, and through all levels for the crafting and gathering classes.
- Job Quests – Combat classes turn into jobs at level 30, after which the quests are considered job quests.
- Role Quests — Introduced in Shadowbringers (5.0), for combat jobs
- Crystalline Mean Quests — Introduced in Shadowbringers (5.0), for crafting and gathering classes
Behind the scenes[]
8-player raids had not yet settled on a difficulty structure in A Realm Reborn, with the Binding Coils of Bahamut being exclusively high-difficulty when released. The Second Coil of Bahamut was the first series to feature a Savage mode of even higher difficulty. Beginning in Heavensward, the difficulty of new normal raids was toned down to make them more accessible, while the Savage difficulty was retooled to represent of the original difficulty, though the Binding Coils remained at their original level.
Unlike other content, the development team currently has no plans to increase the Level or Item Level syncs on Ultimate raids, or allow the them to be run unsynced. This is to preserve the difficulty level as it was when initially released, even as players become more powerful as the game progresses, and ensures that all Ultimate content, both existing and forthcoming, will remain the hardest content for the remainder of the game’s lifespan. While job changes, stronger consumables, and higher gear substats from syncing down higher item level gear have decreased the difficulty of Ultimate raids over time, they remain the some of the most difficult battle content in the game.
Equipment[]
An hyuran warrior with the Bravura and Fighter’s artifact armor.
Marauders and warriors predominantly wield two-handed axes as their weapon. Their armor is primarily made up of «Fending» gear that they share with other tanking disciplines, boasting the highest defenses amongst all armors. At lower levels they also have access to lighter armors used by DPS disciplines. While the bonus attributes of these items may be of use, it is important to weigh their benefits against the defenses lost.
The primary attributes for marauders and warriors are and , which boost their and respectively, and should always be prioritized over other attributes. As tanking disciplines, they have access to the tank-exclusive attribute, which boosts their damage done and healing received, while also lowering damage taken.
| Lists of marauder and warrior equipment | |
|---|---|
|
Head Body Hands Waist Legs Feet |
Earrings Necklaces Bracelets Rings |
Resistance Weapons (iLvl 485)
- Main article: Resistance Weapons/Quest
To unlock the quest chain, players need to be level 80 with a Disciple of War or Disciple of Magic and complete the Main Scenario Quest Shadowbringers (Quest), as well as The City of Lost Angels. Players can obtain one of the relics for free by speaking to Zlatan in Gangos and completing the Side Quest chain (Hail to the Queen> Path to the Past > The Bozja Incident > Fire in the Forge). For subsequent relics you will need to complete the Repeatable Quest Resistance is (Not) Futile), in which Zlatan requires you to obtain and turn in 4 Thavnairian Scalepowders (Available at Auriana in Revenant’s Toll (x: 22.7 — y: 6.7), Hismena in Idyllshire (x: 5.8 — y:5.2), or Sundry Splendors near the main Aetheryte in any major city except the Crystarium for 250 Allagan Tomestones of Poetics each, or 1,000 total).
| Resistance Weapons (iLvl 485) | ||||||||||||||||||||||||||||||||||||
|---|---|---|---|---|---|---|---|---|---|---|---|---|---|---|---|---|---|---|---|---|---|---|---|---|---|---|---|---|---|---|---|---|---|---|---|---|
|
Вакансии Heavensward
Для разблокировки заданий Heavensward требуется больше, чем для предыдущих заданий. Во-первых, у вас должен быть доступ к Небесным областям mdash; это означает, что вы должны пройти сюжетную линию A Realm Reborn который заканчивается квестом Перед рассветом . Все три задания можно получить из квестов, которые начинаются в Ишгарде и требуют от вас 50-го уровня, хотя сами задания начинаются с 30-го уровня .
Темный рыцарь
- Роль: танк
- Оружие: Большой меч
Чтобы открыть задание Темного рыцаря, вы должны сначала выполнить очень короткий квест Темное зрелище , которое можно найти в Столпах Ишгарда. Этот квест включает в себя разговор с Ишгардианским гражданином в (X: 13.2, Y: 8.8) и не более того.
После завершения поговорите с гражданином еще раз, чтобы взять на себя Наш конец .. Этот квест требует, чтобы вы нашли рыцарей храма в Брюме, чтобы исследовать демонического воина. В этом квесте вы найдете и разблокируете Душу Темного рыцаря, а затем встретитесь со своим квестодателем Темного рыцаря, Фраем.
Машинист
- Роль: бойцы дальнего боя.
- Оружие: огнестрельное оружие
Чтобы стать машинистом, вы должны выполнить квест Спаситель Небесной стали . Это началось в Фонде в Ишгарде и дано Стефанивьеном. Ее можно найти на Мануфактуре Небесной Стали в (X: 8, Y: 10).
Этот квест включает в себя краткое знакомство с гильдией машинистов и ваше первое задание mdash; чтобы помочь разыскать мастера меткой гильдии где-нибудь в Ла-Носке. Квест будет включать в себя бой, так что будьте осторожны.
По завершении вы разблокируете задание «Машинист» и сможете приступить к выполнению заданий этого задания.
Астролог
- Роль: целитель.
- Оружие: звездные шары.
Разговор с Жаннеквинар у Столбов в (X: 15 , Y: 10) в Ишгарде позволит вам начать квест Лестница в небеса . Это квест, который вам нужно выполнить, чтобы открыть задание Астролога.
В этом квесте вы исследуете шарлайских астрологов, которые должны были прибыть в Атанеум, но так и не появились. Вам нужно будет найти их в Центральном нагорье Кертас и спасти от бандитов mdash; конфронтация, которая заканчивается получением Кристалла Души Астролога.
Characteristics[]
Appearance
Guest artist Tetsuya Nomura oversaw Gaia’s character design. She is visually a direct contrast to Ryne, having waist-length dark wavy hair and heavy makeup, with large features such as bright blue eyes and larger lips. Her outfit is heavily gothic-inspired with an all black ensemble featuring a form-fitting gown with large, baggy sleeves and platform heel boots. Gaia’s animations are based on the viis race, despite being a hume.
Her exact age is unknown, but she is assumed to be the same age or slightly older than Ryne, who is likely no older than 15. Cylva comments that when Gaia becomes of age, she would consider hiring her as a waitress at the Wandering Stairs in the Crystarium.
As the Voidwalker, Gaia wears a full suit of silver and dark blue armor that conceals her features. She wields a sword in this form.
In her original Ascian form as Loghrif, she appeared as a woman wearing the Shadowless Casting gear. As the Oracle of Darkness, she wears a feathered robe and has a metal halo.
Personality
Gaia is initially impatient, unwilling to become emotionally invested in others and simply wanting to move forward toward finding the truth about herself. Her lack of knowledge of her past is a sore point to her, as she makes clear any time someone tries make her see other points of view. As time goes on, she is affected by Ryne’s efforts to become closer to her, especially upon becoming exposed to the depths of emptiness brought on by the darkness affecting her. She warms up to Ryne, and while still putting on a face of being uptight, it is clear she is now valuing their close friendship.
Recollection Weapons (iLvl 500)
- Main article: Recollection Weapons/Quest
Players can upgrade their weapons again by completing the Repeatable Quest The Will to Resist by trading in 6 Bitter Memories of the Dying obtained from Level 60 Dungeons, once per day from Duty Roulette: Leveling or as a random drop from enemies found in The Bozjan Southern Front. You do not need to have your Augmented Resistance weapon equipped, or even be the same job, to earn bitter memories. Please note that you have to do them «properly». This means you cannot do it unsync.
Recollection weapons gain an aetheric glowing effect, and can be dyed.
| Recollection Weapons (iLvl 500) | ||||||||||||||||||||||||||||||||||||
|---|---|---|---|---|---|---|---|---|---|---|---|---|---|---|---|---|---|---|---|---|---|---|---|---|---|---|---|---|---|---|---|---|---|---|---|---|
|
Официальные и неофициальные ограничения пробной версии Final Fantasy 14
Даже если вы играете в бесплатную пробную версию Final Fantasy 14, готовьтесь к тому, что вам придется потратить кучу времени, чтобы познакомиться со всем доступным контентом. Однако не забывайте, что практически везде есть некоторые ограничения. Ниже мы подробно расскажем о том, что конкретно нельзя делать в пробной версии игры. Все ограничения поделены на две категории – официальные, опубликованные на сайте Square Enix, и неофициальные, которые были выявлены игроками во время игры в бесплатную FFXIV.
Официальные ограничения пробной версии FFXIV
Разработчики проекта открыто говорят о том, что игроки, не купившие полную версию игры:
- Могут создавать только 1 персонажа в одном игровом мире (в общей сложности не более 8 персонажей в разных игровых мирах на одном аккаунте);
- Не могут открыть какой-либо класс или профессию выше 60 уровня;
- Не могут носить с собой более 300 тыс. гил (одной суммой);
- Не имеют доступа к таким функциям внутриигрового чата как «Кричать» (Shout) и «Говорить» (Tell);
- Не могут использовать внутриигровой рынок (Market board);
- Не могут обмениваться и торговать предметами с другими игроками;
- Не могут отсылать письма другим игрокам;
- Не могут нанимать слуг;
- Не могут создавать каналы Linkshell и Cross-World Linkshell, но могут присоединиться к уже существующим;
- Не могут создавать гильдии (Free Company) или вступать в них;
- Не могут приглашать игроков в свою группу, но могут присоединиться к другой группе по приглашению;
- Не могут создавать PvP команды или присоединяться к ним. Также бесплатным учетным записям недоступно участие в рейтинговых и командных рейтинговых PvP сражениях;
- Не могут посещать официальный форум Lodestone и пользоваться приложением Companion.
Неофициальные ограничения пробной версии FFXIV
В списке ниже перечислены все ограничения бесплатной версии игры, которые не указаны на официальном сайте Square Enix, но были выявлены игроками:
- Если на вход в выбранный вами мир есть очередь, то приоритет имеют игроки, которые оплатили FFXIV и имеют «полную» учетную запись. Те, кто играет бесплатно, будут ждать дольше, прежде чем попадут в игру;
- Если вы когда-либо покупали Final Fantasy 14, но потом перестали играть, то вы не сможете пользоваться возможностями пробной учетной записи. Это ограничение действует, даже если вы никогда не проходили контент, который сейчас доступен в бесплатной версии.