Android-x86
Содержание:
- Released Files
- Android-x86 упоминается на CNews совместно со следующими персонами и организациями:
- Other boot options
- Технические нововведения
- Multi-Boot
- Issues
- Android-x86
- Bliss OS-x86
- Key Features
- Как загрузить и установить ISO-образ Android-x86 на компьютер
- Choose a target
- LineageOS
- Key Features
- Install to USB disk
- Testing
- Solving conflicts
- ОС Андроид
- OpenThos
- Join us
- Sponsors
- Credit
- Remix OS for PC
- Released Files
- The branches in Android-x86 tree
Released Files
The release contains these files. Except the images built with kernel 4.9 as before (the first four files), we also provide experimental images built with kernel 4.19 (the last two files). If you have newer devices not supported by kernel 4.9, you may try the kernel 4.19 version. Most modern devices should be able to run the 64-bit ISO. For older devices with legacy BIOS, try the 32-bit ISO.
- 64-bit ISO: cm-x86_64-14.1-r5.iso
sha1sum: 4c00748c451923bb27c52375e59bc0bfeed8f32f
- 32-bit ISO: cm-x86-14.1-r5.iso
sha1sum: 4c96ce5b0259c1351805df3de4105d4f778ae668
- 64-bit rpm: cm-x86-14.1-r5.x86_64.rpm
sha1sum: edac951267ccffaaef52042de213cc3ec6998175
- 32-bit rpm: cm-x86-14.1-r5.i686.rpm
sha1sum: cd5b8661e02ee0af5c84b4bcb5ba97516ca8a805
- 64-bit ISO with kernel 4.19: cm-x86_64-14.1-r5-k419.iso
sha1sum: 973050d4dc2d4addc14a7aa310926cbf98f76dae
Recommended for newer devices - 32-bit ISO with kernel 4.19: cm-x86-14.1-r5-k419.iso
sha1sum: 7acdc986be6473fd4d9580a1ac2686cff68f81d8
Recommended for newer devices
You can choose one of these files depends on your devices. In doubt, try the 32-bit ISO for legacy BIOS devices and 64-bit files for UEFI devices.
To use an ISO file, Linux users could just dump it into a usb drive to create a bootable usb stick like :
where /dev/sdX is the device name of your usb drive.
Windows’s users can use the tool Win32 Disk Imager to create a bootable usb stick.
In doubt, try the 32-bit files for legacy BIOS devices and 64-bit files for UEFI devices. Please read this page about how to install it to the device.
Except the traditional ISO files, we also package android-x86 files into a Linux package rpm. It allows Linux users to easily install the release into an existing Linux device with a standalone ext4 root partition. On an rpm based device (Fedora/Red Hat/CentOS/SUSE…), just install it like a normal rpm package:
On a deb based device (Debian/Ubuntu/LinuxMint/…), please use the alien tool to install it:
All files will be installed to the /cm-x86-14.1-r5/ subdirectory and a boot entry will be added to grub2 menu. Reboot and choose cm-x86 item from the menu to enter the system. Alternatively, you can launch cm-x86 in a QEMU virtual machine by the installed qemu-android script:
Note Android-x86 running in QEMU and the real machine (after rebooting) share the same data sub-folder.
To uninstall it:
Android-x86 упоминается на CNews совместно со следующими персонами и организациями:
|
Intel Corporation
10730 |
|
AMD — Advanced Micro Devices
3468 |
|
Google LLC
9272 |
|
Samsung Electronics
8891 |
|
VMware
1952 |
|
Microsoft Corporation
20721 |
|
Huawei
3106 |
|
Xiaomi
958 |
|
Apple Inc — Эппл Рус
10044 |
|
Nokia Corporation
5221 |
|
Meizu
143 |
|
Nvidia Corp
2998 |
|
XDA Developers — Сообщество мобильных разработчиков
54 |
|
Wi-Fi — Wireless Fidelity LAN — Wi-Fi 802.11 Wave — IEEE 802.11 — Стандарт беспроводной связи
10001 |
|
Ethernet — Семейство технологий пакетной передачи данных
2843 |
|
Bluetooth — Bluetooth Smart — Bluetooth LE — Bluetooth Low Energy
6199 |
|
USB — Universal Serial Bus — Универсальная последовательная шина
9113 |
|
ARM64 — Архитектура процессора
1203 |
|
SD — Secure Digital — Формат флэш-карт — Secure Digital High Capacity (SDHC) — SD Ultra Capacity (SDUC) — SD eXtended Capacity (SDXC) — MicroSD — уменьшенная версия популярного формата карты памяти SD Secure Digital
4844 |
|
UEFI — The Unified Extensible Firmware Interface — Интерфейс между операционной системой и микропрограммами — Развитие BIOS
94 |
|
OpenGL ES — подмножество графического интерфейса
62 |
|
UEFI Secure Boot — протокол
24 |
|
USB-накопитель — USB-устройство — USB-носитель
773 |
|
Google Android
11560 |
|
Intel x86 — архитектура процессора
1255 |
|
Google Android 8 Oreo
142 |
|
Microsoft Windows 10
10044 |
|
Google Android 9 Pie
167 |
|
Meizu Flyme Android OS
44 |
|
Google Android M — Google Android 6 Marshmallow
120 |
|
Apple Face ID
131 |
|
Apple Touch ID
216 |
|
OpenGL — Язык программирования
213 |
|
Google Material Design — Google Material UI — стиль графического дизайна интерфейсов программного обеспечения и приложений
38 |
|
QEMU
23 |
|
Samsung DeX — Desktop eXperience
48 |
|
Google Android 10
179 |
|
Meizu mTouch
10 |
|
Mesa — библиотека графических API OpenGL и Vulkan с открытым исходным кодом
9 |
|
Microsoft Surface — Планшет
323 |
|
Google Play — Google Store — Android Market
2620 |
|
Microsoft Windows 7
1724 |
|
ZIP — Формат архивации файлов и сжатия данных
261 |
|
Google Android 1 Cupcake
2 |
|
Google Android 5 Lollipop
150 |
|
Apple iPhone — серия смартфонов
5776 |
|
Apple iPhone XS — Серия смартфонов
130 |
|
Xiaomi MIUI — MI User Interface — Операционная система на Android
178 |
|
Huawei EMUI — Huawei Emotion UI — графическая оболочка
200 |
|
Apple iPhone X — Серия смартфонов
220 |
|
Apple iPhone XR — Серия смартфонов
103 |
|
Microsoft Windows
1326 |
|
Samsung Galaxy S — серия смартфонов
1223 |
|
Samsung One UI
45 |
|
Apple macOS
1210 |
|
Linux OS
7116 |
|
Apple iOS
6163 |
|
Nvidia GeForce GTX
3044 |
|
США — Калифорния
2633 |
|
Google I/O Всемирная конференция разработчиков
99 |
Other boot options
- Live CD — Run Android-x86 without installation
The item means to boot Android-x86 directly. This is useful to check if your hardware is compatible with Android-x86 quickly. All data is stored in RAM (tmpfs) and will lose after poweroff.
Live CD — Debug mode
See the debug howto for more details.
Live CD — Vulkan support (experimental)
Enable the experimental Vulkan support. Not all GPUs support it.
Live CD — No Setup Wizard
Skip the Setup Wizard. It’s useful if you want to test some apps quickly in live mode.
Live CD VESA mode — No GPU hardware acceleration
Disable GPU hardware acceleration. If you encounter black screen after booting, you may try this mode to see if it’s bootable.
Технические нововведения
В первую очередь разработчики из Android-x86 обновили ядро ОС – в настольной Android 8.1 используется ядро Linux версии 4.19.15, вышедшее 13 января 2019 г. Поддерживаются 32- и 64-битные сборки ядра.
В систему внедрена полноценная поддержка звуковых карт, мультисенсорных экранов, модулей Wi-Fi и Bluetooth последних версий, а также всех необходимых датчиков (сенсоров освещенности, приближения, гироскопа, акселерометра и др.), сетевых карт Ethernet и встроенных фотокамер. На случай, если в гаджете нет датчика положения, в систему встроили функцию ForceDefaultOrientation для ручного задания ориентации экрана. Она позволяет корректно отображать приложения, рассчитанные на вертикальное (портретное) расположение, на ландшафтных экранах.
Помимо этого, пользователю не придется вручную монтировать подключаемые к компьютеру USB-накопители и карты microSD – система определит их наличие и откроет к ним доступ автоматически.
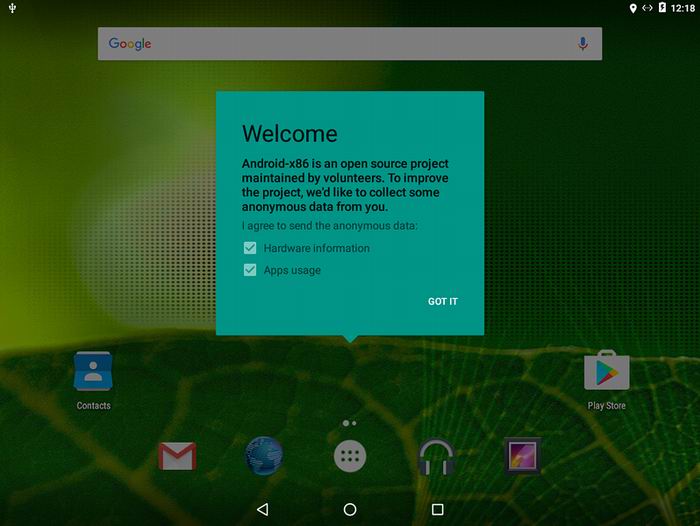
Интерфейс Android-x86 6.0 Marshmallow образца сентября 2016 г.
В системе используется OpenGL-совместимая библиотека Mesa версии 18.3.1, обеспечивающая поддержку OpenGL ES 3.x с аппаратным ускорением графики для графических процессоров NVIDIA, AMD и Intel. Она же используется для виртуальных машин VMware и QEMU.
Security Vision 5: эволюция автоматизации
Безопасность

К дополнительным особенностям настольной Android 8.1 относятся: поддержка тем оформления в загрузчике GRUB-EFI, поддержка мыши при запуске системы в виртуальных машинах, возможность загрузки в UEFI Secure Boot и интерактивный инсталлятор, работающий в текстовом режиме. Систему можно установить на диск при использовании UEFI.
Multi-Boot
To boot other operating systems, you have to add items for them to /grub/menu.lst. For example, to boot Windows, add the following:
title Windowsrootnoverify (hd0,0)chainloader +1
This assumes Windows is installed to the first partition of the first hard disk. Alternatively, you need to change rootnoverify to the appropriate value. See Grub Manual for details.
froyo
Issues
VMware
You have to change your virtual disk type to be IDE because the default type in VMware is SCSI, and Android-x86 kernel is not configured to support SCSI. You can follow these steps:
- Create a virtual machine.
- Edit virtual machine settings after the virtual machine created.
- Choose the hard disk and remove it.
- Add a hard disk to create a new virtual disk, then you can choose IDE as your virtual disk type.
- When finished, you can install android-x86 normally.
Android-x86
This OS option has the goal of being a “complete solution for Android on common x86 platforms.” according to the developers. As they say on the official website, “You may think Android-x86 as an Android BSP (Board Support Package) of generic x86 platforms.”
There are tons of software that lets you use Android on PC but not all work the same. Android-x86 is one of the finest open-source systems for your x86 or x64 computer.
It provides a wide range of supports such as a multi-touch screen, Wi-Fi, Bluetooth, camera, and many more features.
The Android-x86 uses the Linux kernel 4.19.15 which enables it to support a wide variety of hardware. Overall, it is one of the most resourceful Android OS systems out there. Currently, the developers are working to support Android 10 as well (the current version is 9).
Bliss OS-x86
Bliss OS-x86 is an open source Android-based operating system for PC computers and tablets. Hardware wise, this Android OS flavor can be installed and run on any Windows/Linux PC, Chromebook, Macbook or Tablet released in the last 4 years (i.e 2016 and later).
The current version of Bliss uses the Android 9.0 Pie codebase and is designed to work with both the mobile systems as well as with desktop and laptops. The new Bliss OS 12 will be based on Android 10.
Their main focus of Bliss OS is to provide quality ROMs that can be installed on as many hardware platforms as possible. This can run on most of your devices, preserving customizations and options. The x86 variant is of course for Desktop PC computers that are equipped with x86/x86_64 compatible CPUs.
The User Interface can be configured as either Desktop UI or Tablet UI based on the launcher being used.
Key Features
The 9.0-r1 release is based on the latest Android 9.0.0 Pie release (android-9.0.0_r53). The features include:
- Support both 64-bit and 32-bit kernel and userspace with latest LTS kernel 4.19.105.
- Support OpenGL ES 3.x hardware acceleration for Intel, AMD, Nvidia and QEMU(virgl) by Mesa 19.3.4.
- Support OpenGL ES 2.0 via SwiftShader for software rendering on unsupported GPU devices.
- Support hardware accelerated codecs on devices with Intel HD & G45 graphics family.
- Support secure booting from UEFI and installing to UEFI disk.
- A text based GUI installer.
- Add theme support to GRUB-EFI.
- Support Multi-touch, Audio, Wifi, Bluetooth, Sensors, Camera and Ethernet (DHCP only).
- Simulate WiFi adapter on devices with Ethernet only to increase app compatibility.
- Auto-mount external usb drive and sdcard.
- Add Taskbar as an alternative launcher which puts a start menu and recent apps tray on top of your screen and support freeform window mode.
- Enable ForceDefaultOrientation on devices without known sensors. Portrait apps can run in a landscape device without rotating the screen.
- Support arm arch apps via the native bridge mechanism. (Settings -> Android-x86 options, 64-bit only)
- Support to upgrade from non-official releases.
- Add experimental Vulkan support for newer Intel and AMD GPUs. (Boot via Advanced options -> Vulkan support)
- Mouse integration support for VMs including VirtualBox, QEMU, VMware and Hyper-V.
Как загрузить и установить ISO-образ Android-x86 на компьютер
Загрузить ISO
Все образы проекта Android-x86 полностью бесплатны, в отличие от образов других проектов, таких как AndEX. Чтобы установить эту операционную систему на наш компьютер, первое, что мы должны сделать, это загрузить последнюю доступную версию.
Это можно найти в Следующая ссылка of FossHUB, или на Следующая ссылка в репозитории OSDN.
Как видим, мы можем найти несколько изображений, доступных для загрузки. Нас интересуют ISO-образы, поскольку именно их мы, несомненно, собираемся установить и использовать на нашем компьютере. Мы можем выбрать, хотим ли мы загрузить 32-разрядную версию или 64-разрядную версию.
Мы рекомендуем загрузить 64-битную версию, так как она имеет большую совместимость и дает меньше проблем с эксплуатацией.
Когда у нас есть ISO на нашем компьютере, мы должны выбрать, как мы собираемся его использовать. Если мы собираемся установить его, например, на виртуальную машину, то с самим ISO-образом это того стоит. Если вместо этого мы хотим записать его на USB-накопитель, чтобы установить его на любой компьютер с нуля, мы можем использовать Руфус программное обеспечение для создания нашего Android Установка 9.0 USB.
Как мы видим, нам нужно будет выполнить эту программу, выбрать устройство, на которое мы собираемся записать ISO, схему разделов, систему назначения и параметры форматирования. Пожилые люди также могут выбрать, хотим ли мы, чтобы в памяти был создан постоянный раздел, то есть такой, где мы можем сохранять данные, не удаляя их каждый раз, когда мы отключаем память.
Как установить Android 9.0 «Пирог» на ПК
После того, как мы создали USB-накопитель или виртуальную машину, на которую мы собираемся установить Android, процесс будет довольно простым и не вызовет никаких трудностей для любого пользователя. Мы запускаем компьютер (или виртуальную машину), выбираем, что мы хотим загрузиться с ISO или USB, которые мы только что создали, и, наконец, мы можем увидеть загрузчик GRUB этой системы.
Как мы видим, мы можем выбрать, хотим ли мы загрузить Live Mode, то есть загрузить систему в Оперативная память и используйте его, ничего не устанавливая на ПК, или установите Android на свой компьютер. Мы увидим второй вариант.
Мы выбираем вариант установки и запускаем простой мастер текстового режима, которому мы должны следовать до конца. Первое, что мы сделаем, это выберем раздел или жесткий диск, на который мы хотим установить эту операционную систему. Если у нас нет готового раздела, на этом экране мы можем создать новый раздел для этого.
На следующем шаге мы выберем, хотим ли мы отформатировать рассматриваемый раздел. Поскольку Android основан на Linux, мы рекомендуем использовать файловую систему EXT4.
Мы продолжаем установку Android на наш компьютер и спрашиваем, хотим ли мы установить GRUB в качестве загрузчика. Кроме того, он также спросит нас, хотим ли мы, чтобы системный раздел имел разрешения на чтение и запись или только на чтение.
Продолжаем работу с мастером, и он начнет копировать все системные файлы на жесткий диск. Когда закончите, он спросит, хотим ли мы перезагрузить компьютер или запустить Android-x86 на компьютере.
У нас уже установлен Android на нашем ПК. Нам нужно будет завершить работу мастера начальной настройки этой операционной системы (как если бы мы купили новый мобильный телефон), и, когда закончите, у нас будет готовый Android, работающий на нашем компьютере.
Choose a target
You need to choose a target for the x86 device you want to use/test. We provides several targets for different branches:
-
- android_x86_64: for 64-bit x86_64 platform
- android_x86: for 32-bit x86 platform
-
android_x86: for x86 platform
-
- generic_x86: for generic x86 PC/notebook
- amd_brazos: for AMD Brazos platform
- eeepc: for ASUS EeePC family only
- asus_laptop: for some ASUS laptops
- tegav2: for Tegatech Tegav2 (may work with other Atom N45x based tablets)
-
- generic_x86: for generic x86 PC/notebook
- eeepc: for ASUS EeePC family only
- asus_laptop: for some ASUS laptops
- tegav2: for Tegatech Tegav2 (may work with other Atom N45x based tablets)
- sparta: for Dell Inspiron Mini Duo platform
- vm: for virtual machine (virtual box, qemu, vmware)
- motion_m1400: for Motion M1400 (Intel Centrino M based with Intel PRO/Wireless)
-
- generic_x86: for generic x86 PC/notebook
- eeepc: for ASUS EeePC family only
- q1u: for Samsung Q1U
- s5: for Viliv S5
-
- eeepc: for ASUS EeePC family only
- q1u: for Samsung Q1U
- s5: for Viliv S5
Unless you are trying to build an ancient branch, you should just use android_x86_64 for a 64-bit target, or android_x86 for a 32-bit target. They are the universal targets for all x86 devices.
Historically, you should use to use generic_x86 for eclair-x86 to ics-x86 branches. However, it may not optimized for a particular target device. Use eeepc for a generic x86 for donut-x86 branch or before, unless you have the particular devices supported by other targets.
If you are a developer, you can create a target based on android_x86 for your device. See this article for details. However, it’s not recommended to do so unless you are a very experienced Android platform developer.
LineageOS
The original name of LineageOS was “Cyanogen” which was a very popular custom ROM used for flashing smartphones with an enhanced OS.
Lineage is of course based on the Android OS and is free and open-source. It offers customization for your personalization and preference as everyone is unique and your device should be too.
Although LineageOS is mostly installed on smartphones and tablets by users, it can also be installed and run on Windows or Linux PCs. Here is a video showing how to install it on a PC and dual-boot with Windows 10 https://www.youtube.com/watch?v=HGB_OV0yCUo
Because this software has a very big community, it is actively developed and supports even the latest Android versions.
Moreover, with its enhanced tools and exclusive APIs, it will turn any device into the perfect device for apps development.
Key Features
The 9.0-rc1 release is based on the latest Android 9.0.0 Pie release (android-9.0.0_r50). The features include:
- Support both 64-bit and 32-bit kernel and userspace with latest LTS kernel 4.19.80.
- Support OpenGL ES 3.x hardware acceleration for Intel, AMD, Nvidia and QEMU(virgl) by Mesa 19.0.8.
- Support OpenGL ES 3.0 via SwiftShader for software rendering on unsupported GPU devices.
- Support hardware accelerated codecs on devices with Intel HD & G45 graphics family.
- Support secure booting from UEFI and installing to UEFI disk.
- A text based GUI installer.
- Add theme support to GRUB-EFI.
- Support Multi-touch, Audio, Wifi, Bluetooth, Sensors, Camera and Ethernet (DHCP only).
- Auto-mount external usb drive and sdcard.
- Add Taskbar as an alternative launcher which puts a start menu and recent apps tray on top of your screen and support freeform window mode.
- Enable ForceDefaultOrientation on devices without known sensors. Portrait apps can run in a landscape device without rotating the screen.
- Support arm arch apps via the native bridge mechanism. (Settings -> Android-x86 options)
- Support to upgrade from non-official releases.
- Add experimental Vulkan support for newer Intel and AMD GPUs. (Boot via Advanced options -> Vulkan support)
- Simulate WiFi adapter by Ethernet to increase app compatibility.
- Mouse integration support for VMs including VirtualBox, QEMU, VMware and Hyper-V.
Install to USB disk
For advanced linux users, you may create a bootable USB disk by hand. Here are the steps:
- Install grub to your USB disk
- find a linux machine with the latest grub installed
- partition your USB drive with fdisk or gpartd and mark the partition as bootable
- format that partition to ext4 (recommended) or vfat.
- mount your usb drive to /mnt
- cd /mnt
- grub-install —root-directory=. —no-floppy /dev/<your usb device node name>
- cd /boot/grub
- create your menu.lst based on the next section
Add this section to menu.lst
title Run Android-x86
kernel /android/kernel root=/dev/ram0 androidboot.selinux=permissive SRC=/android
initrd /android/initrd.img
title Run Android-x86 (VESA mode)
kernel /android/kernel root=/dev/ram0 androidboot.selinux=permissive vga=788 SRC=/android
initrd /android/initrd.img
title Run Android-x86 (Debug mode)
kernel /android/kernel root=/dev/ram0 androidboot.selinux=permissive vga=788 SRC=/android DEBUG=1
initrd /android/initrd.img
Note androidboot.selinux=permissive must be added since nougat-x86. Besides, before marshmallow-x86, androidboot.hardware=<target> must be added to specify the target name of the built image. However, do not add this option since nougat-x86.
Since kitkat-x86 the SRC= parameter may be omitted if the system image is in the same directory as the kernel.
Create /android directory in the USB disk, and copy the four files kernel initrd.img ramdisk.img system.sfs (or system.img if you set USE_SQUASHFS=0) to it.
Then you can boot from the USB disk and enjoy Android. Note all data are saved to the ramdisk, so all will lose after power off. If you hope to save data to disk, see the next section.
Testing
The generated image is located at
out/target/product/$TARGET_PRODUCT/$TARGET_PRODUCT.iso
You can easily test the iso file by a virtual machine like virtual box or qemu. Alternatively, on a Linux host you can use the qemu-android script (available since nougat-x86) to run android-x86 in qemu directly:
To test the image on a real x86 hardware, you can burn the iso to a compact disc (CD), then boot it on the target device. Check the manual of your vendor to see how to boot from a CD. On booting it will automatically detect your hardware and load necessary modules.
Since honeycomb-x86, we support the hybrid iso format. That is, the iso could be dumped to a usb disk directly. For example,
where /dev/sdX is the device name of your USB disk. The feature is available for all iso files released after 2011/12/25.
If you build an rpm file, install it to your Linux host and run the qemu-android script directly. Or reboot and choose android-x86 item from the booting menu.
For more details about how to use the iso or install it, see the installation howto.
Solving conflicts
There are several reason to have conflicts during repo sync, say
- You modify your tree locally.
- The upstream changed. Since we usually keep syncing with original Android repository, sometimes we have to rebase with it. That changes the history and may cause conflicts.
In this section we assume you have conflicts due to the upstream changed. That is, you don’t have local modifications. If you do, you have to solve conflicts yourself. If you follow the procedures in this section, you may lose your local modifications.Here is an example of a conflict in mainfest:
remote: Counting objects: 71, done.
remote: Compressing objects: 100% (41/41), done.
remote: Total 65 (delta 25), reused 28 (delta 9)
Unpacking objects: 100% (65/65), done.
From git://git.tarot.com.tw/android-x86/platform/manifest
d53e6c1..2de7a11 android-1.5r2 -> origin/android-1.5r2
* android-1.5r3 -> origin/android-1.5r3
* android-sdk-1.5_r3 -> origin/android-sdk-1.5_r3
d53e6c1..c544020 cupcake -> origin/cupcake
* cupcake-release -> origin/cupcake-release
f4d79b1..6f7e0dd donut -> origin/donut
+ 7308d31…4a4f936 lan -> origin/lan (forced update)
+ b480a6d…d82496e local -> origin/local (forced update)
+ 11c9d96…84345fb master -> origin/master (forced update)
+ 5bcbf93…66e92cc mirror -> origin/mirror (forced update)
+ 9f3092f…665f9e8 ssh -> origin/ssh (forced update)
+ c6037be…d70927f ssh-mirror -> origin/ssh-mirror (forced update)
+ 00a823f…3ddaf66 test -> origin/test (forced update)
* android-1.5r3 -> android-1.5r3
* android-sdk-1.5_r3 -> android-sdk-1.5_r3
Fetching projects: 100% (128/128), done.
project .repo/manifests/
First, rewinding head to replay your work on top of it…
Applying: merge donut, change or add the projects to x86 port
error: patch failed: default.xml:3
error: default.xml: patch does not apply
Using index info to reconstruct a base tree…
Falling back to patching base and 3-way merge…
Auto-merging default.xml
CONFLICT (content): Merge conflict in default.xml
Failed to merge in the changes.
Patch failed at 0001 merge donut, change or add the projects to x86 port
When you have resolved this problem run «git rebase —continue».
If you would prefer to skip this patch, instead run «git rebase —skip».
To restore the original branch and stop rebasing run «git rebase —abort».
repo sync stopped due to conflicts. Since we don’t have local modifications, just ignore it by git rebase --skip:
HEAD is now at 4a4f936 add branch for local lan
Applying: add platform/frameworks/policies/base to x86
error: patch failed: default.xml:18
error: default.xml: patch does not apply
Using index info to reconstruct a base tree…
Falling back to patching base and 3-way merge…
Auto-merging default.xml
No changes — Patch already applied.
Applying: add branch for local lan
error: patch failed: default.xml:1
error: default.xml: patch does not apply
Using index info to reconstruct a base tree…
Falling back to patching base and 3-way merge…
Auto-merging default.xml
No changes — Patch already applied.
If it complains about another conflict, do git rebase --skip again, until the rebase procedure completes. Usually it is enough, but if you hope to be absolute clean, you can ignore the current branch and checkout a new one like (suppose you’re using oreo-x86 branch):
This may not be the best approach to solve conflicts, but should be easy enough for beginners. If you have better suggestions, just tell us.
ОС Андроид
Забудьте про эмулятор если у вас есть возможность установить полноценную ОС. На это есть целый ряд преимуществ, которые это подтвердят:
- Для работы системы достаточно всего 1 ГБ ОЗУ. Для игр необходимо 2 ГБ и более в зависимости от игры.
- Идеальное решение для слабых ПК (Пример в видео ниже).
- Доступен весь функционал Андроид.
- Можно установить в качестве дополнительной системы или основной. ОС Андроид не будет влиять на работу вашей Windows.
- Установить так же легко, как эмулятор.
- Полная оптимизация под компьютер.
Недостаток в том, что в некоторых случаях бывает несовместимость с железом ПК. Я думаю этого достаточно для того, чтоб Вы решили, что лучше для Вас.
Установка Phoenix OS
Phoenix OS – это полноценная операционная система Андроид для ПК, которая имеет лаунчер (оболочка/загрузчик или внешний вид) как у Windows 10. Т.е. другими словами, это гибрид 2 операционных систем с внешним видом Windows и функционалом мобильного устройства.
Немного скриншотов с моего компьютера:


Кто подписан на мой YouTube канал, тот уже с ней знаком и знает, как установить:
Для тех, кто не любит смотреть видео или не имеет такой возможности, порядок установки следующий:

- Запускаем .exe файл и нажимаем «Install». Выберите любой диск, можно даже «Диск С». На нём создастся папка «PhoenixOS» в которой будет всего 8 файлов. S. система никак не навредит вашей основной ОС.
- По завершению установки подтвердите перезагрузку компьютера, после чего подождите пока он включится.
- При запуске системы у вас будет выбор языка «Английский» или «Китайский» выберите английский, потом поставим русский язык в настройках.
- Система полностью установлена, осталось дождаться пока она обновиться (5-10 мин.) и нам нужно установить русский язык. Для этого откройте «Настройки» на панели задач и перейдите в раздел «language» далее нажмите на + и добавьте русский язык.
Готово. Установка и настройка системы не отнимает много времени (плюс-минус 15 мин.). Теперь нажав на кнопку «Пуск» и выбрав «Google Play» введите логин и пароль от своего Google аккаунта, и Вы можете использовать все функции Андроид на компьютере.
OpenThos
OpenThos is a relatively new Android operating system for PCs that lets you enjoy both Android and Linux applications side by side. The apps can be run on a windowed mode enabling you to multitask and manage several apps at a time.
It uses the Android Lollipop kernel and runs only on computers with 64-bit technology. You also don’t need to install any driver as it will detect your PC or laptop automatically. However, OpenThos doesn’t include Playstore so you need to get that from a third-party site.
Since this is a Chinese app, you will have some difficulty to download and install the OS. Also, there are not that many English instructions online.
Join us
If you are interesting in running Android on PC or netbook, consider to join us. See how to contact us.
Sponsors
Sponsored by Onlinecasino24.org.
Sponsored by Allvideoslots.com.
Thanks to www.newcasinosonline.co for contributing for our website.
Sponsored by GoWin — PayPal Casinos and Presented by Slotsify — Alla Casinon i Sverige.
Thanks to casinobonuses.com — The best way to compare casino bonuses.
A big thank you to Ready Slots Go for contributing to this page.
Sponsored by KingCasinoBonus.co.uk – mobile casino reviewer.
Sponsored by Terrarium tv.
Sponsored by SlotsAdviser.com — the #1 online slots portal in the UK and an Android mobile casinos fan.
Thanks to Coffee Corner for buying us a drip coffee maker.
Sponsored by the best bookmaker in the world, bet365 and by newfreespinscasino.com which offers an unique bitcoin casino list.
Sponsored by StickerYou.com, manufacturers of quality Custom Stickers and Custom Labels.
Sponsored by Showbox and Customer Service Number
Acuity Training for various technical advice.
Sponsored by 9APPS APK DOWNLOAD & Android Apps Free Download.
Sponsored by TutuApp.
Sponsored by Lucky Patcher Apk & Freedom Apk.
Sponsored by Lucky Patcher and Microsoft Support.
Supported by Official ShowBox Website, ShowBox APK and FaceTime for PC.
Sponsored by ShowBox for Android & ShowBox APK file.
Sebastian Albrecht from Vancouver special, Lorne Marr, Toronto Realtor Elli Davis, and Chantal Marr from No medical life insurance for their support.
Credit
Current project maintainer is Chih-Wei Huang (cwhuang@android-x86.org).
0xlab, a group of engineers enthusiastic in open source software development , contributed many fixes and improvements to the Android frameworks, included the OpenGL ES hardware acceleration for Android-x86.
Michael Chen <omxcodec@gmail.com> who developed the stagefright-plugins to improve the multimedia support.
Dima Zavin <dima@android.com>, the original guy ported the Android to EeePC 701
Geunsik Lim <leemgs@gmail.com>, wrote original «HOWTO Build Android-X86 Full Source» and «How to use x86 android platform on virtualbox »
Chen Yang <sunsetyang@gmail.com> for the instructions on the how to make boot-able image and how to build Android for VMware, and investigations on almost all of the build breaks and run time issues
Jackie Wu <jackie.wu@intel.com> for the fix in alarm.c
Niels Keeman <nielskeeman@gmail.com> for the investigation on the path issue in the battery service jni code, v4l2 camera support (android-m912 project)
Luca Belluccini <lucabelluccini@gmail.com> for the first patch to fix the path issue in the battery service jni code
Kevin Jeng <khjeng@princeton.edu> for adding the mouse wheel support
Andrew Hughes <ashughes@gmail.com> for the works on iwlwifi4965 and Thinkpad x61 testing
Al Sutton <alsutton@android-x86.org> for testing and work on the ViewSonic ViewPad 10
Remix OS for PC
Remix OS started out as a very promising Android OS for computers but the developers (jide) stopped maintaining it. However you can still download the software and check it out, although it uses the codebase of the old Android Marshmallow 6.0 version (based on Android-x86).
The taskbar of the system and right-click function is similar to Windows 10. Remix OS has a super easy installation process and you can utilize the system on an older PC as it’s easier to operate compared to Linux or Windows.
The hardware requirements are pretty low, with 2 GHz dual-core processor, 2 GB RAM and minimum 8 GB of hard disk space. It also works on both 32 and 64 bit systems.
Released Files
This release contains four files. You can choose one of these files depends on your devices. Most modern devices should be able to run the 64-bit ISO. For older devices with legacy BIOS, you may try the 32-bit ISO.
- 32-bit ISO: android-x86-7.1-rc1.iso
sha1sum: d1b61d6ad1979496cddd800182b0011df3b0d5b9
- 64-bit ISO: android-x86_64-7.1-rc1.iso
sha1sum: 0b839ef59f9ff8f1c1ac42205d61efd72cb4b48c
- 32-bit rpm: android-x86-7.1-rc1.i686.rpm
sha1sum: 4a85315ca879d08cf8317b1925e06d973058fdf1
- 64-bit rpm: android-x86-7.1-rc1.x86_64.rpm
sha1sum: c0b07e49cd0410de094bd27dd7ab92befefac847
To use an ISO file, Linux users could just dump it into a usb drive to create a bootable usb stick like :
where /dev/sdX is the device name of your usb drive.
Windows’s users can use the tool Win32 Disk Imager to create a bootable usb stick.
Please read this page about how to install it to the device.
In doubt, try the 32-bit files for legacy BIOS devices and 64-bit files for UEFI devices. Please read this page about how to install it to the device.
rpm
This will update your older installation like 6.0-r2 or 6.0-r3 if you have.
On a deb based device (Debian/Ubuntu/LinuxMint/…), please use the alien tool to install it:
All files will be installed to the /android-7.1-rc1/ subdirectory and boot entries will be added to grub2 menu. Reboot and choose android-x86 item from the menu to boot Android-x86. Alternatively, you can launch Android-x86 in a QEMU virtual machine by the installed qemu-android script:
Note Android-x86 running in QEMU and the real machine (after rebooting) share the same data sub-folder.
The branches in Android-x86 tree
Since AOSP evolves very quickly, we have created different branches corresponding to different releases of AOSP:
-
q-x86
Based on Android 10.0 release -
pie-x86
Based on Android 9.0 release (Pie QPR2) -
oreo-x86
Based on Android 8.1 release (Oreo MR1) -
nougat-x86
Based on Android 7.1 release (Nougat MR2) -
marshmallow-x86
Based on Android 6.0 release (Marshmallow) -
lollipop-x86
Based on Android 5.1 release (Lollipop) -
kitkat-x86
Based on Android 4.4 release (KitKat) -
jb-x86
Based on Android 4.3 release (Jelly Bean) -
ics-x86
Based on Android 4.0 release (Ice Cream Sandwich) -
honeycomb-x86
Based on Android 3.2 release (Honeycomb) -
gingerbread-x86
Based on Android 2.3 release (Gingerbread) -
froyo-x86
Based on Android 2.2 release (Froyo) -
eclair-x86
Based on Android 2.1 release (Eclair) -
donut-x86
Based on Android 1.6 release (Donut) -
cupcake-x86 (aka android-x86-b0.9)
Based on Android 1.5 release (Cupcake)